Google Pay
Collect payment from Google Pay wallets
Google Pay enables customers to make seamless one-touch payments using cards linked to their Google accounts. They simply select a saved card on the modal to complete their transaction. This streamlined process enhances the user experience within your app.
Google Pay Acceptable Use Policy
Merchants using this method must comply with Google Pay APIs Acceptable Use Policy and accept Google Pay API Terms of Service.
Requirements
Before you begin, ensure the following prerequisites are met:
- Read the introduction section of this documentation.
- Make sure your Flutterwave account is active and live.
- Retrieve your API keys from the Flutterwave dashboard.
- Register your business or app on the Google Pay and Wallet Console.
- Notify customers within your app about Google Pay availability in their region. View the list of supported countries.
- Prompt users to link a card to their Google account or confirm they already have one linked.
- Verify that your users’ browsers support Google Pay. View the list of supported browsers.
Supported Card Networks
Google Pay supports the following card networks:
- Visa (Global coverage)
- Mastercard (Global coverage)
- American Express Cards (Global coverage)
- Discover (US 🇺🇸)
- Elo (Brazil 🇧🇷)
- Interac (Canada 🇨🇦)
- Maestro (EU and Brazil).
How Google Pay Works
When a customer selects Google Pay as their payment option, they’re redirected to their Google Wallet to authorize the transaction. After successful authorization, Flutterwave processes the charge and sends a notification to your application via webhooks. You can then verify the transaction and deliver your product or service.
Payment Flow
To process a Google Pay transaction:
- Initiate Payment: Collect the required payment details and initiate the transaction.
- Authorize Payment: Redirect the customer to the Google Pay interface to authorise and complete the payment.
- Verify Payment: After authorization, verify the transaction status via webhooks or by polling the retrieve a charge endpoint.
Initiating Google Pay Transactions with Flutterwave
Integration Method
This guide follows the general integration flow. Please refer to the orchestrator flow for the alternative integration method.
Step 1: Create a Customer
Send a request to the create customer endpoint with the relevant fields such as name, email, phone, and address
While only the email field is required, we recommend collecting as much customer information as possible to support robust transaction records and future payments.
To retrieve existing customer details, use the retrieve customer endpoint. This is useful when initiating payments for returning users.
curl --request POST \
--url 'https://developersandbox-api.flutterwave.com/customers' \
--header 'Authorization: Bearer {{YOUR_ACCESS_TOKEN}}' \
--header 'Content-Type: application/json' \
--header 'X-Trace-Id: {{YOUR_UNIQUE_TRACE_ID}}' \
--header 'X-Idempotency-Key: {{YOUR_UNIQUE_INDEMPOTENCY_KEY}}' \
--data '{
   "address":{
      "city":"Shirley",
      "country":"US",
      "line1":"175 E Parkview Dr",
      "line2":"",
      "postal_code":"11967",
      "state":"New York"
   },
   "name":{
      "first":"John",
      "middle":"Agba",
      "last":"Doe"
   },
   "phone":{
      "country_code":"1",
      "number":"6313958745"
   },
   "email":"[email protected]"
}'
You'll get a response similar to this:
{
   "status":"success",
   "message":"Customer created",
   "data":{
      "id":"cus_dc0FUyBpd0",
      "address":{
         "city":"Shirley",
         "country":"US",
         "line1":"175 E Parkview Dr",
         "line2":"",
         "postal_code":"11967",
         "state":"New York"
      },
      "email":"[email protected]",
      "name":{
         "first":"John",
         "middle":"Agba",
         "last":"Doe"
      },
      "phone":{
         "country_code":"1",
         "number":"6313958745"
      },
      "meta":{

      },
      "created_datetime":"2024-12-25T20:16:38.246410457Z"
   }
}
Step 2: Create a Google Pay Payment Method
To create a Google Pay payment method, send a request to the create payment method endpoint. In your requeat, set the type to googlepay and include the googlepay object with the card_holder_name field.
curl --request POST \
--url 'https://developersandbox-api.flutterwave.com/payment-methods' \
--header 'Authorization: Bearer {{YOUR_ACCESS_TOKEN}}' \
--header 'Content-Type: application/json' \
--header 'X-Trace-Id: {{YOUR_UNIQUE_TRACE_ID}}' \
--header 'X-Idempotency-Key: {{YOUR_UNIQUE_INDEMPOTENCY_KEY}}' \
--data '{
   "type":"googlepay",
   "googlepay":{
      "card_holder_name":"John Doe"
   }
}'
You'll get a response similar to this:
{
  "status": "success",
  "message": "Payment method created",
  "data": {
    "type": "googlepay",
    "googlepay": {
      "card_holder_name": "John Doe"
    },
    "id": "pmd_l1n7o0RSRL",
    "meta": {},
    "created_datetime": "2024-12-25T19:56:37.589670129Z"
  }
}
Step 3: Create the Charge
To initiate a Google Pay charge, send a request to the create charge endpoint with the following parameters:
customer_id: The ID returned from Step 1 (customer creation).payment_method_id: The ID returned from Step 2 (payment method creation).- Transaction details including:
amount,currency, and a uniquereferencefor the transaction.
curl --request POST \
--url 'https://developersandbox-api.flutterwave.com/charges' \
--header 'Authorization: Bearer {{YOUR_ACCESS_TOKEN}}' \
--header 'Content-Type: application/json' \
--header 'X-Trace-Id: {{YOUR_UNIQUE_TRACE_ID}}' \
--header 'X-Idempotency-Key: {{YOUR_UNIQUE_INDEMPOTENCY_KEY}}' \
--data '{
   "currency":"USD",
   "customer_id":"cus_dc0FUyBpd0",
   "payment_method_id":"pmd_l1n7o0RSRL",
   "amount":150,
   "reference":"ex61m23ja3y0mk34o8ilrri"
}'
You'll get a response similar to this:
{
   "status":"success",
   "message":"Charge created",
   "data":{
      "id":"chg_y1sbU67oAs",
      "amount":150,
      "fees":[
         {
            "type":"vat",
            "amount":0
         },
         {
            "type":"app",
            "amount":0
         },
         {
            "type":"merchant",
            "amount":0
         },
         {
            "type":"stamp_duty",
            "amount":0
         }
      ],
      "currency":"USD",
      "customer_id":"cus_dc0FUyBpd0",
      "settled":false,
      "settlement_id":[],
      "meta":{},
      "next_action":{
         "type":"redirect_url",
         "redirect_url":{
            "url":"https://developer-sandbox-ui-sit.flutterwave.cloud/redirects?googlepay&token=eyJhbGciOiJIUzI1NiJ9.eyJjbGllbnRJZCI6ImNiYThhMTkwLTE2OGUtNGNmZS05NmY5LTE2NDZhYjFhOWNkYiIsImNoYXJnZUlkIjoiY2hnX3kxc2JVNjdvQXMiLCJzdWIiOiJjYmE4YTE5MC0xNjhlLTRjZmUtOTZmOS0xNjQ2YWIxYTljZGIiLCJpYXQiOjE3MzgzMTgzMzcsImV4cCI6MTczODMxODYzN30.YXbaZbLYi986aSfGDRrznYJIAYCvipaCYGRo4dV8Muk"
         }
      },
      "payment_method_details":{
         "type":"googlepay",
         "googlepay":{
            "card_holder_name":"John Doe"
         },
         "id":"pmd_l1n7o0RSRL",
         "meta":{},
         "created_datetime":"2024-12-25T19:56:37.589Z"
      },
      "reference":"ex61m23ja3y0mk34o8ilrri",
      "status":"pending",
      "processor_response":{
         "type":"pending",
         "code":"02"
      },
      "created_datetime":"2025-01-31T10:12:17.607459311Z"
   }
}
Step 4: Authorizing the Payment
The response from the charge initiation contains the next_action object with a URL. This URL redirects the customer to Google Pay to authorise and complete the payment.
{
   "status":"success",
   "message":"Charge created",
   "data":{
      "id":"chg_bM3EBQodZO",
      "amount":150,
      "currency":"USD",
      "customer_id":"cus_dc0FUyBpd0",
      "settled":false,
      "settlement_id":[],
      "meta":{},
      "next_action":{
         "type":"redirect_url",
         "redirect_url":{
            "url":"https://developer-sandbox-ui-sit.flutterwave.cloud/redirects?googlepay&token=eyJhbGciOiJIUzI1NiJ9.eyJjbGllbnRJZCI6ImNiYThhMTkwLTE2OGUtNGNmZS05NmY5LTE2NDZhYjFhOWNkYiIsImNoYXJnZUlkIjoiY2hnX2JNM0VCUW9kWk8iLCJzdWIiOiJjYmE4YTE5MC0xNjhlLTRjZmUtOTZmOS0xNjQ2YWIxYTljZGIiLCJpYXQiOjE3MzUxNTk4NzYsImV4cCI6MTczNTE2MDE3Nn0.frIwvEZ3hGT03BuLCznLpGETBk3zmffDh73o9A1WyHg"
         }
      },
      "payment_method_details":{
         "type":"googlepay",
         "googlepay":{
            "card_holder_name":"John Doe"
         },
         "id":"pmd_l1n7o0RSRL",
         "meta":{},
         "created_datetime":"2024-12-25T19:56:37.589Z"
      },
      "reference":"ex61m23j6a3y0mk34o8ilrri",
      "status":"pending",
      "created_datetime":"2024-12-25T20:51:16.223929494Z"
   }
}
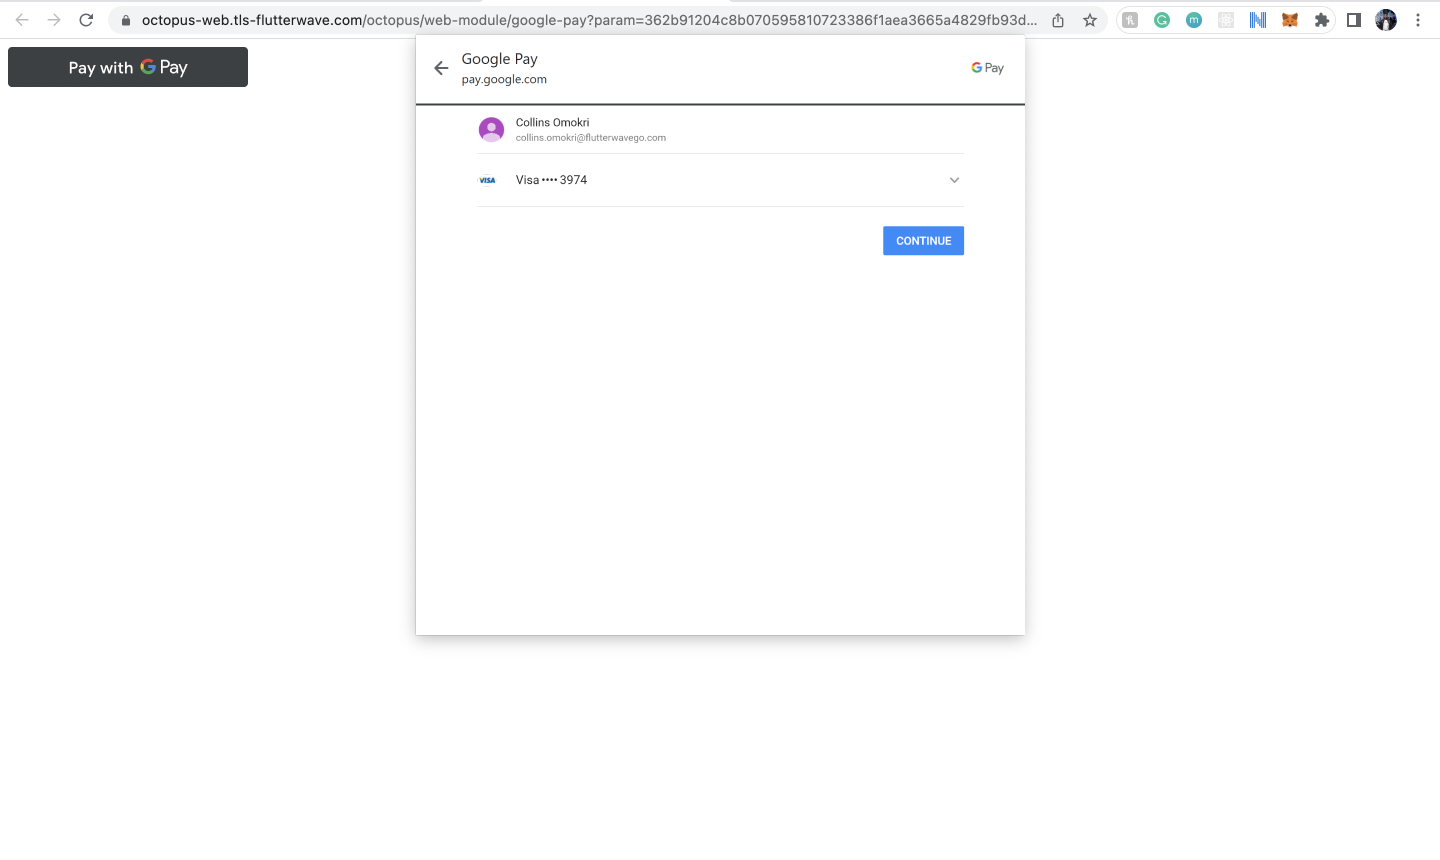
The customer is first redirected to the Google Pay button. Clicking it opens a payment modal where they can choose their preferred card to complete the transaction.
Flutterwave will then send a webhook notification with the final transaction status once the payment is completed and funds are received.
Refer to the next section to learn how to verify the transaction.
Step 5: Verifying the Payment
Before you provide value to the customer, confirm the transaction's final status and amount. You can verify the transaction information either using webhooks or by retrieving the charge details:
- Webhooks: It is important to have webhooks enabled on your Flutterwave dashboard. If you have webhooks enabled, we'll call your webhook URL with the payment details when the transaction is completed or fails. Below is a sample webhook payload:
{
  "webhook_id": "wbk_VTIxM7rMAYBA4qyUHCfN",
  "timestamp": 1738318396966,
  "type": "charge.completed",
  "data": {
    "id": "chg_y1sbU67oAs",
    "amount": 150,
    "currency": "USD",
    "customer": {
      "id": "cus_dc0FUyBpd0",
      "address": {
        "city": "Shirley",
        "country": "US",
        "line1": "175 E Parkview Dr",
        "line2": "",
        "postal_code": "11967",
        "state": "New York"
      },
      "email": "[email protected]",
      "name": {
        "first": "John",
        "middle": "Agba",
        "last": "Doe"
      },
      "phone": {
        "country_code": "1",
        "number": "6313958745"
      },
      "meta": {},
      "created_datetime": "2024-12-25T20:16:38.246Z"
    },
    "description": null,
    "meta": {},
    "payment_method": {
      "type": "googlepay",
      "googlepay": {
        "card_holder_name": "John Doe"
      },
      "id": "pmd_l1n7o0RSRL",
      "customer_id": null,
      "meta": {},
      "device_fingerprint": null,
      "client_ip": null,
      "created_datetime": "2024-12-25T19:56:37.589Z"
    },
    "redirect_url": null,
    "reference": "ex61m23ja3y0mk34o8ilrri",
    "status": "succeeded",
    "processor_response": {
      "type": "approved",
      "code": "00"
    },
    "created_datetime": "2025-01-31T10:12:17.607Z"
  }
}
- Retrieve the Charge: You can manually check the status of a charge by calling the retrieve a charge endpoint using the charge ID, which is returned in the
data.idfield of the response after successfully initiating a charge.
curl --request GET \
--url 'https://developersandbox-api.flutterwave.com/charges/id' \
--header 'Authorization: Bearer <YOUR_ACCESS_TOKEN>' \
--header 'Content-Type: application/json' \
--header 'X-Trace-Id: <YOUR_UNIQUE_TRACE_ID>' \
--header 'X-Idempotency-Key: <YOUR_UNIQUE_INDEMPOTENCY_KEY>' \
You'll get a response similar to this:
{
  "status": "success",
  "message": "Charge fetched",
  "data": {
    "id": "chg_ZJHA7fDsii",
    "amount": 150,
    "currency": "USD",
    "customer_id": "cus_dc0FUyBpd0",
    "settled": false,
    "settlement_id": [],
    "meta": {},
    "payment_method_details": {
      "type": "googlepay",
      "googlepay": {
        "card_holder_name": "John Doe"
      },
      "id": "pmd_l1n7o0RSRL",
      "meta": {},
      "created_datetime": "2024-12-25T19:56:37.589Z"
    },
    "reference": "ynl2z0guxkk50rndlo44p30d",
    "status": "succeeded",
    "processor_response": {
      "type": "approved",
      "code": "00"
    },
    "created_datetime": "2024-12-25T21:38:53.370Z"
  }
}
Testing your Integration
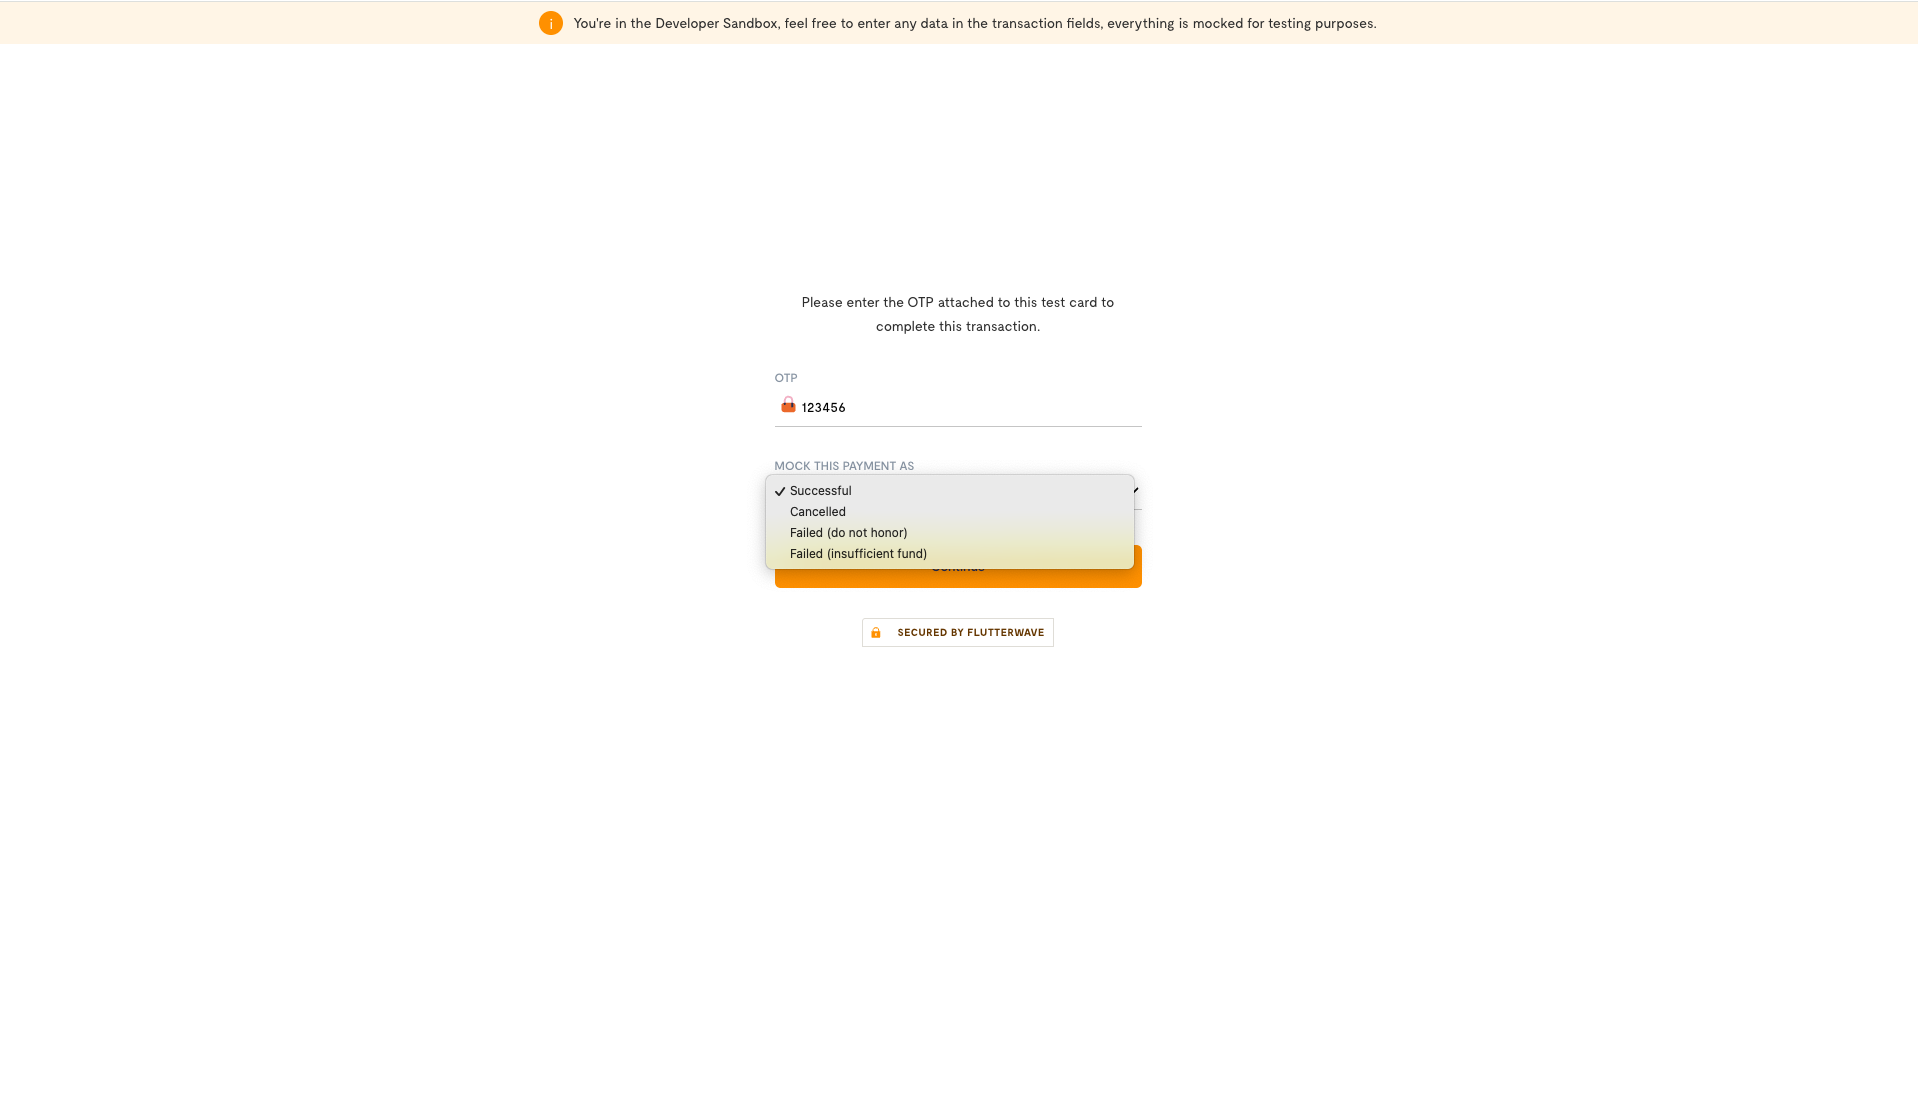
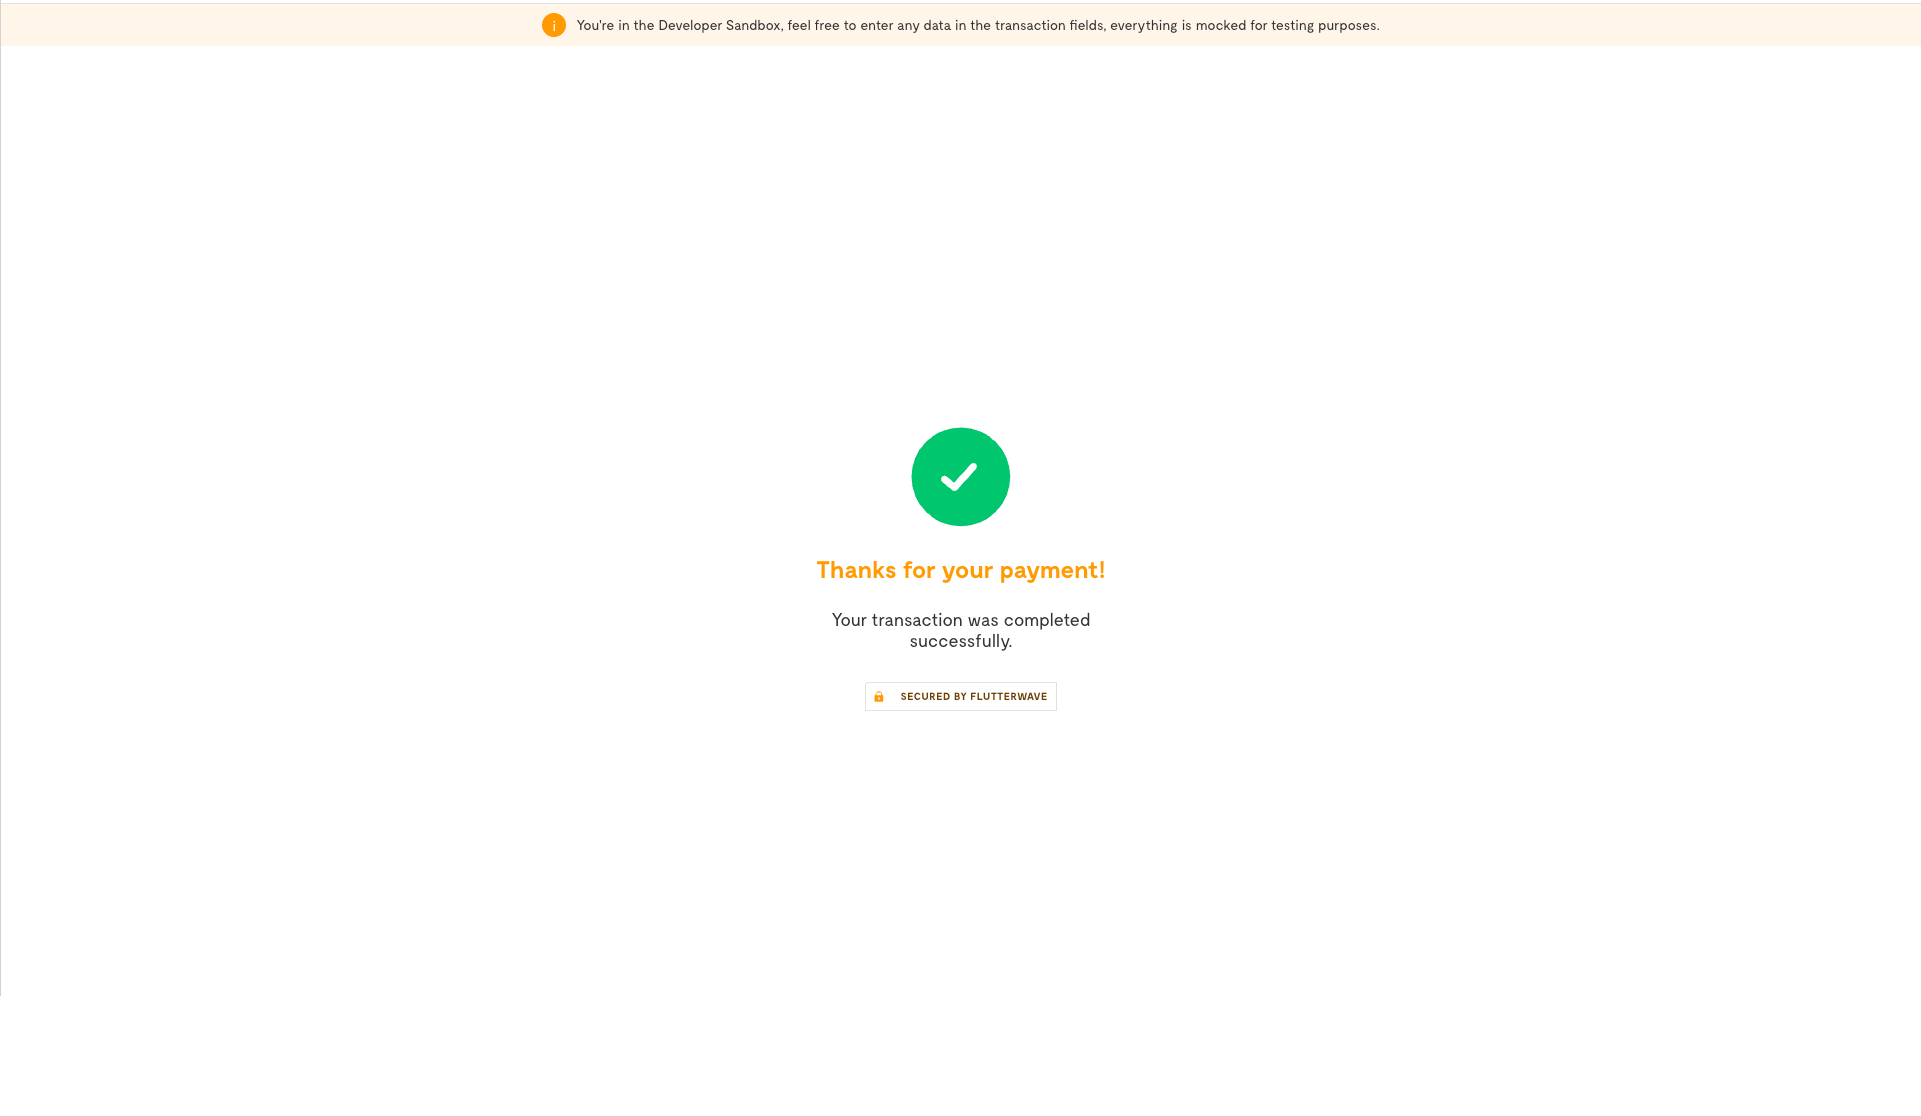
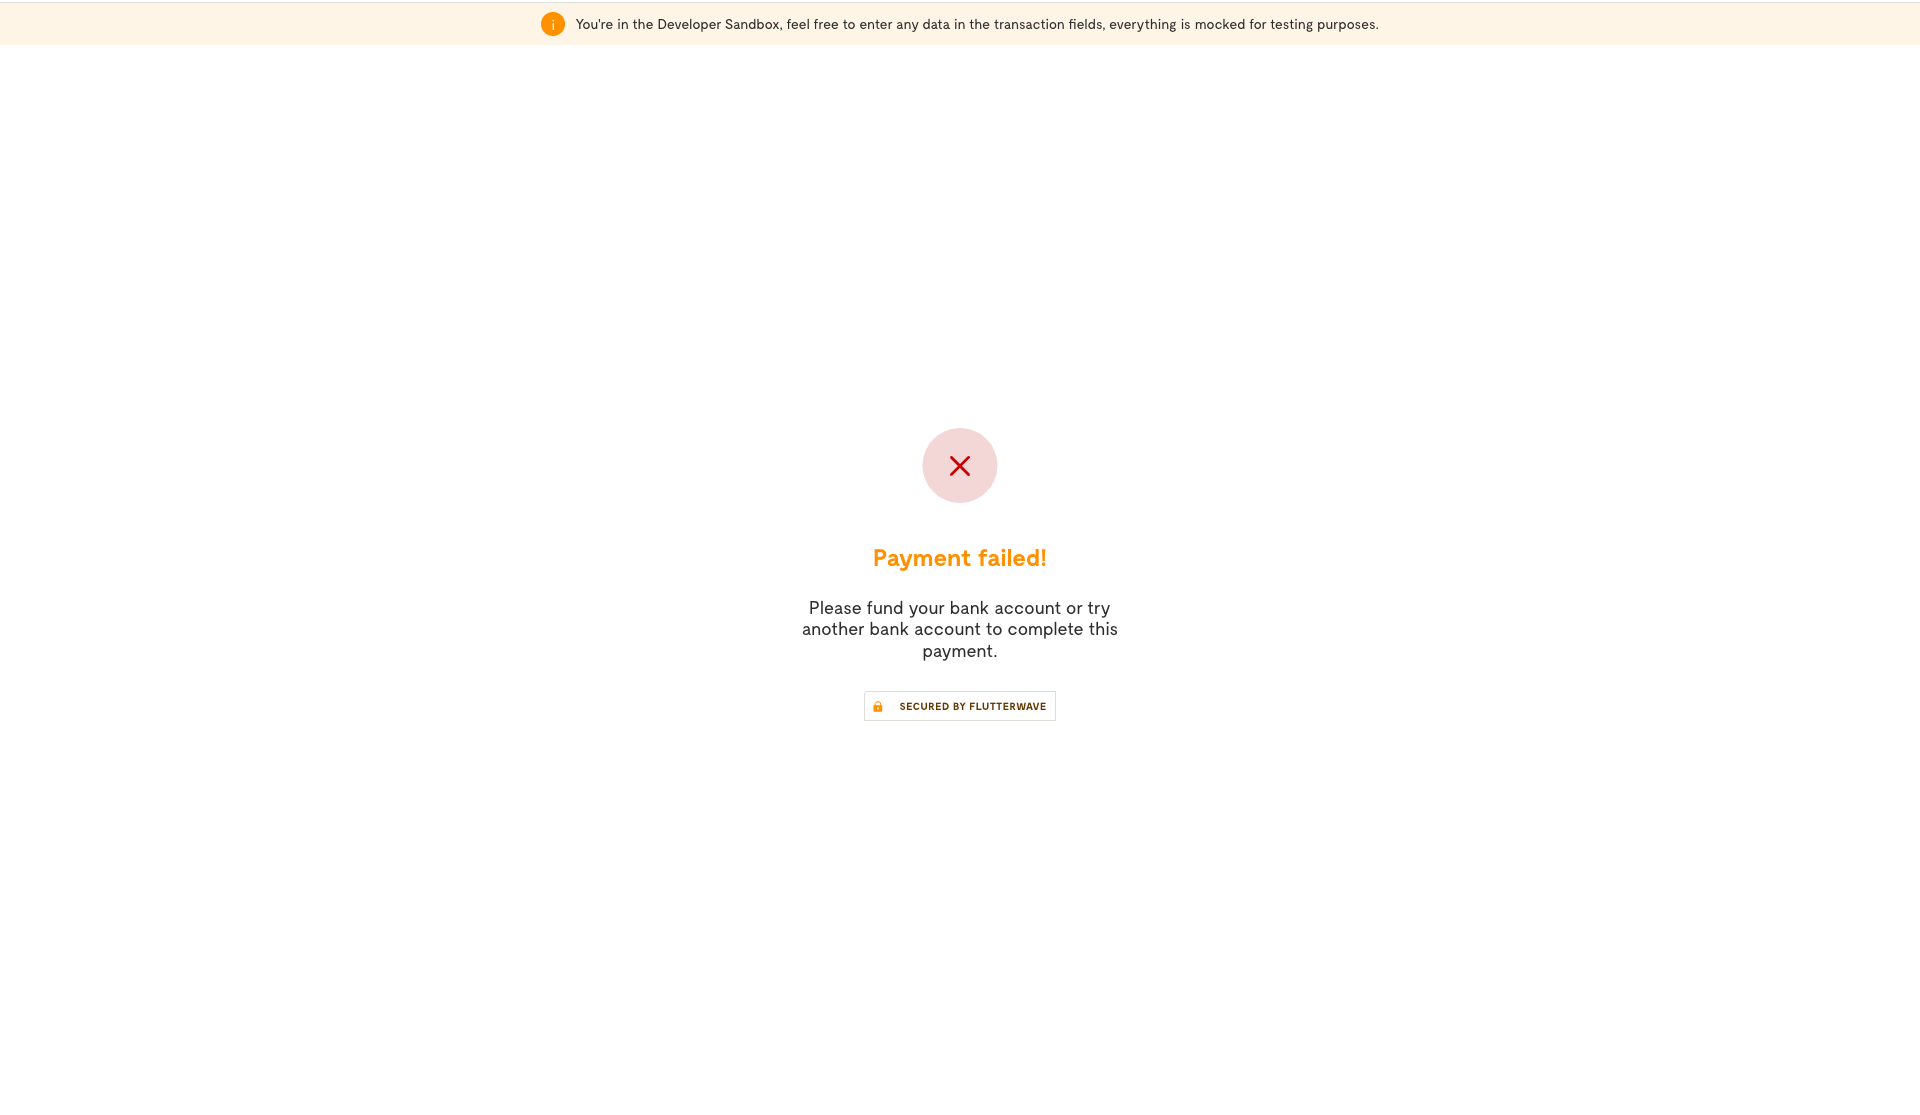
Testing your integration requires no extra configuration or special data. Initiate the Google Pay charge, and we'll return a redirect link to our mock page, where you can simulate both successful and failed customer attempts.
Next Steps
That’s it! You’ve successfully integrated the Google Pay method. It doesn't end there, there is more:
- Learn about settlements of successful payments into your Flutterwave balance.
- For cases where refunds are necessary, see the refunds guide for more information on how to process transaction refunds.
- Improve your app's payment experience with the Google brand guide and Google Pay UX best practices.
Updated 3 months ago