Woocommerce
Usage
- Download the plugin zip file from this link
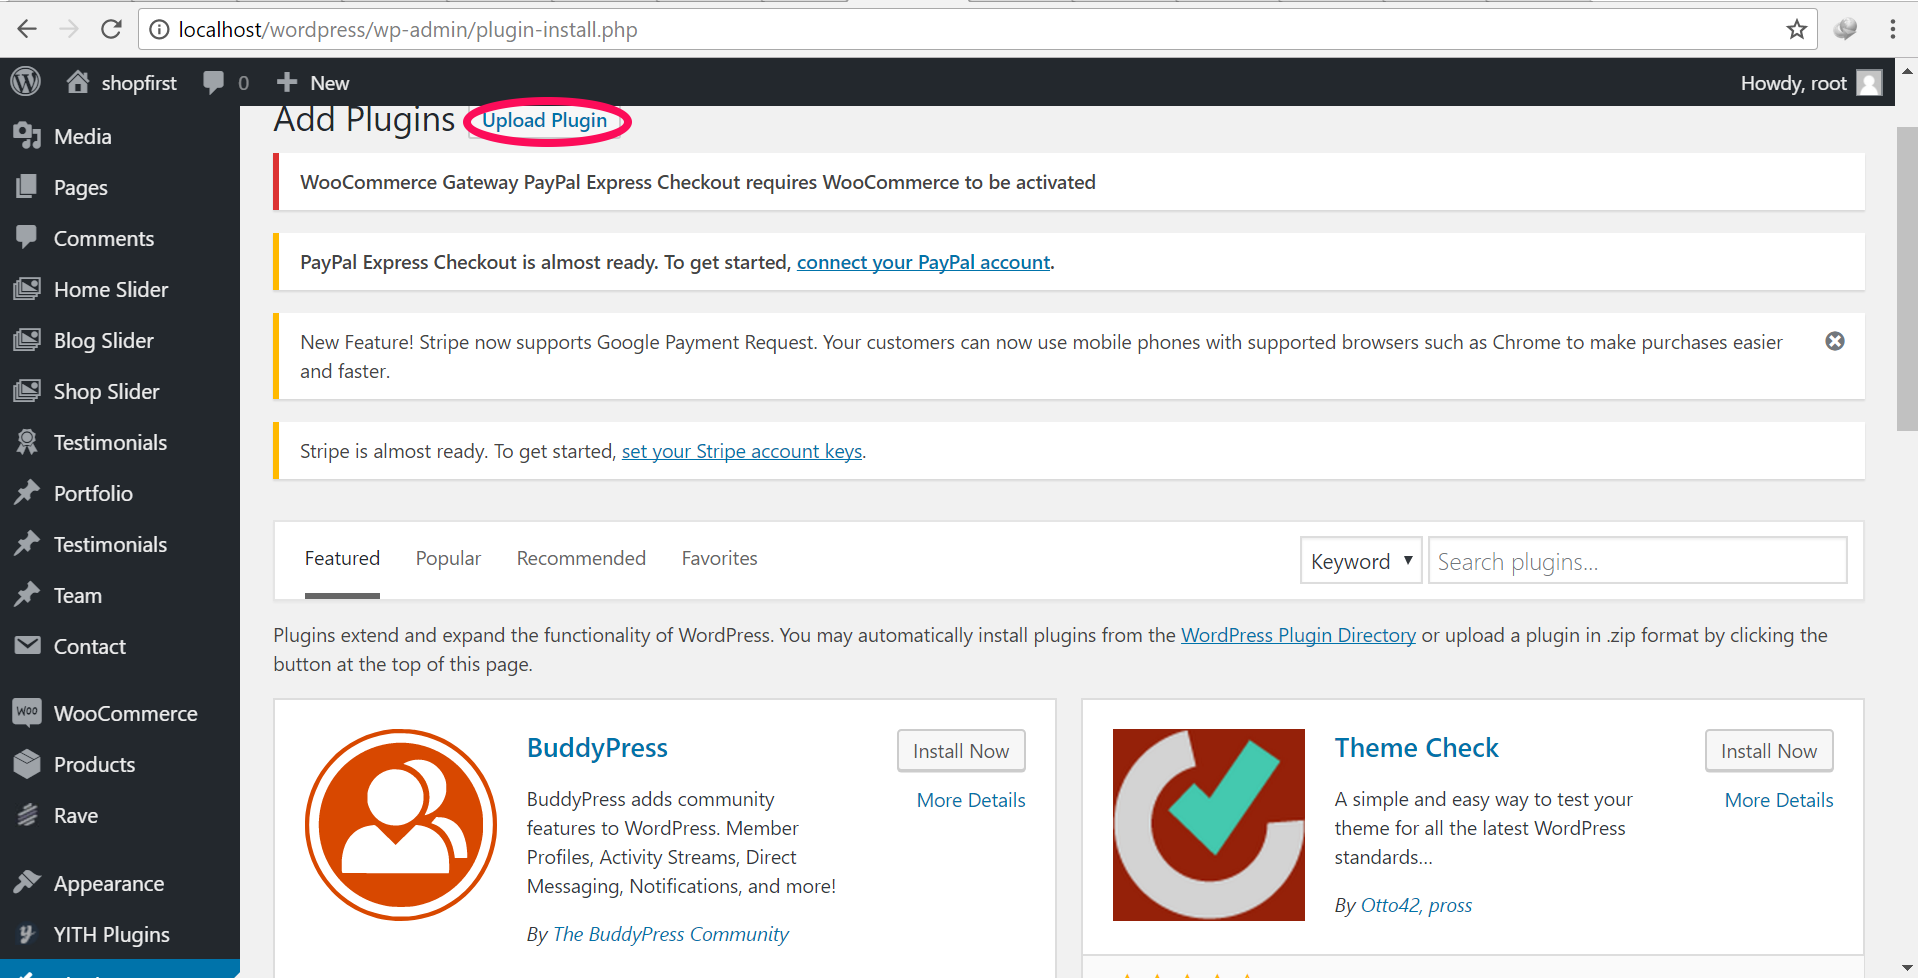
- Login to your WordPress Admin. Click on "Plugins > Add New" from the left menu then click on upload.

-
After clicking the "Upload" option, then click "Choose File" to select the zip file you downloaded. Click "OK" and "Install Now" to complete the installation.
-
Activate the plugin.
-
Click on "WooCommerce > Settings" from the left menu and click the "Checkout" tab.
-
Click on the Rave link from the available Checkout Options
-
Configure your Rave Payment Gateway settings accordingly.
Configure the plugin
To configure the plugin, go to WooCommerce > Settings from the left menu, click Checkout tab. Click on Rave.
-
Enable/Disable - check the box to enable Rave Payment Gateway.
-
Pay Button Public Key - Enter your public key which can be retrieved from the "Pay Buttons" page on your Rave account dashboard.
-
Modal Title - (Optional) customize the title of the Pay Modal. Default is FLW PAY.
-
Modal Description - (Optional) customize the description on the Pay Modal. Default is FLW PAY MODAL.
-
Click Save Changes to save your changes.
Updated over 6 years ago
