iOS
Rave's iOS Drop-In UI
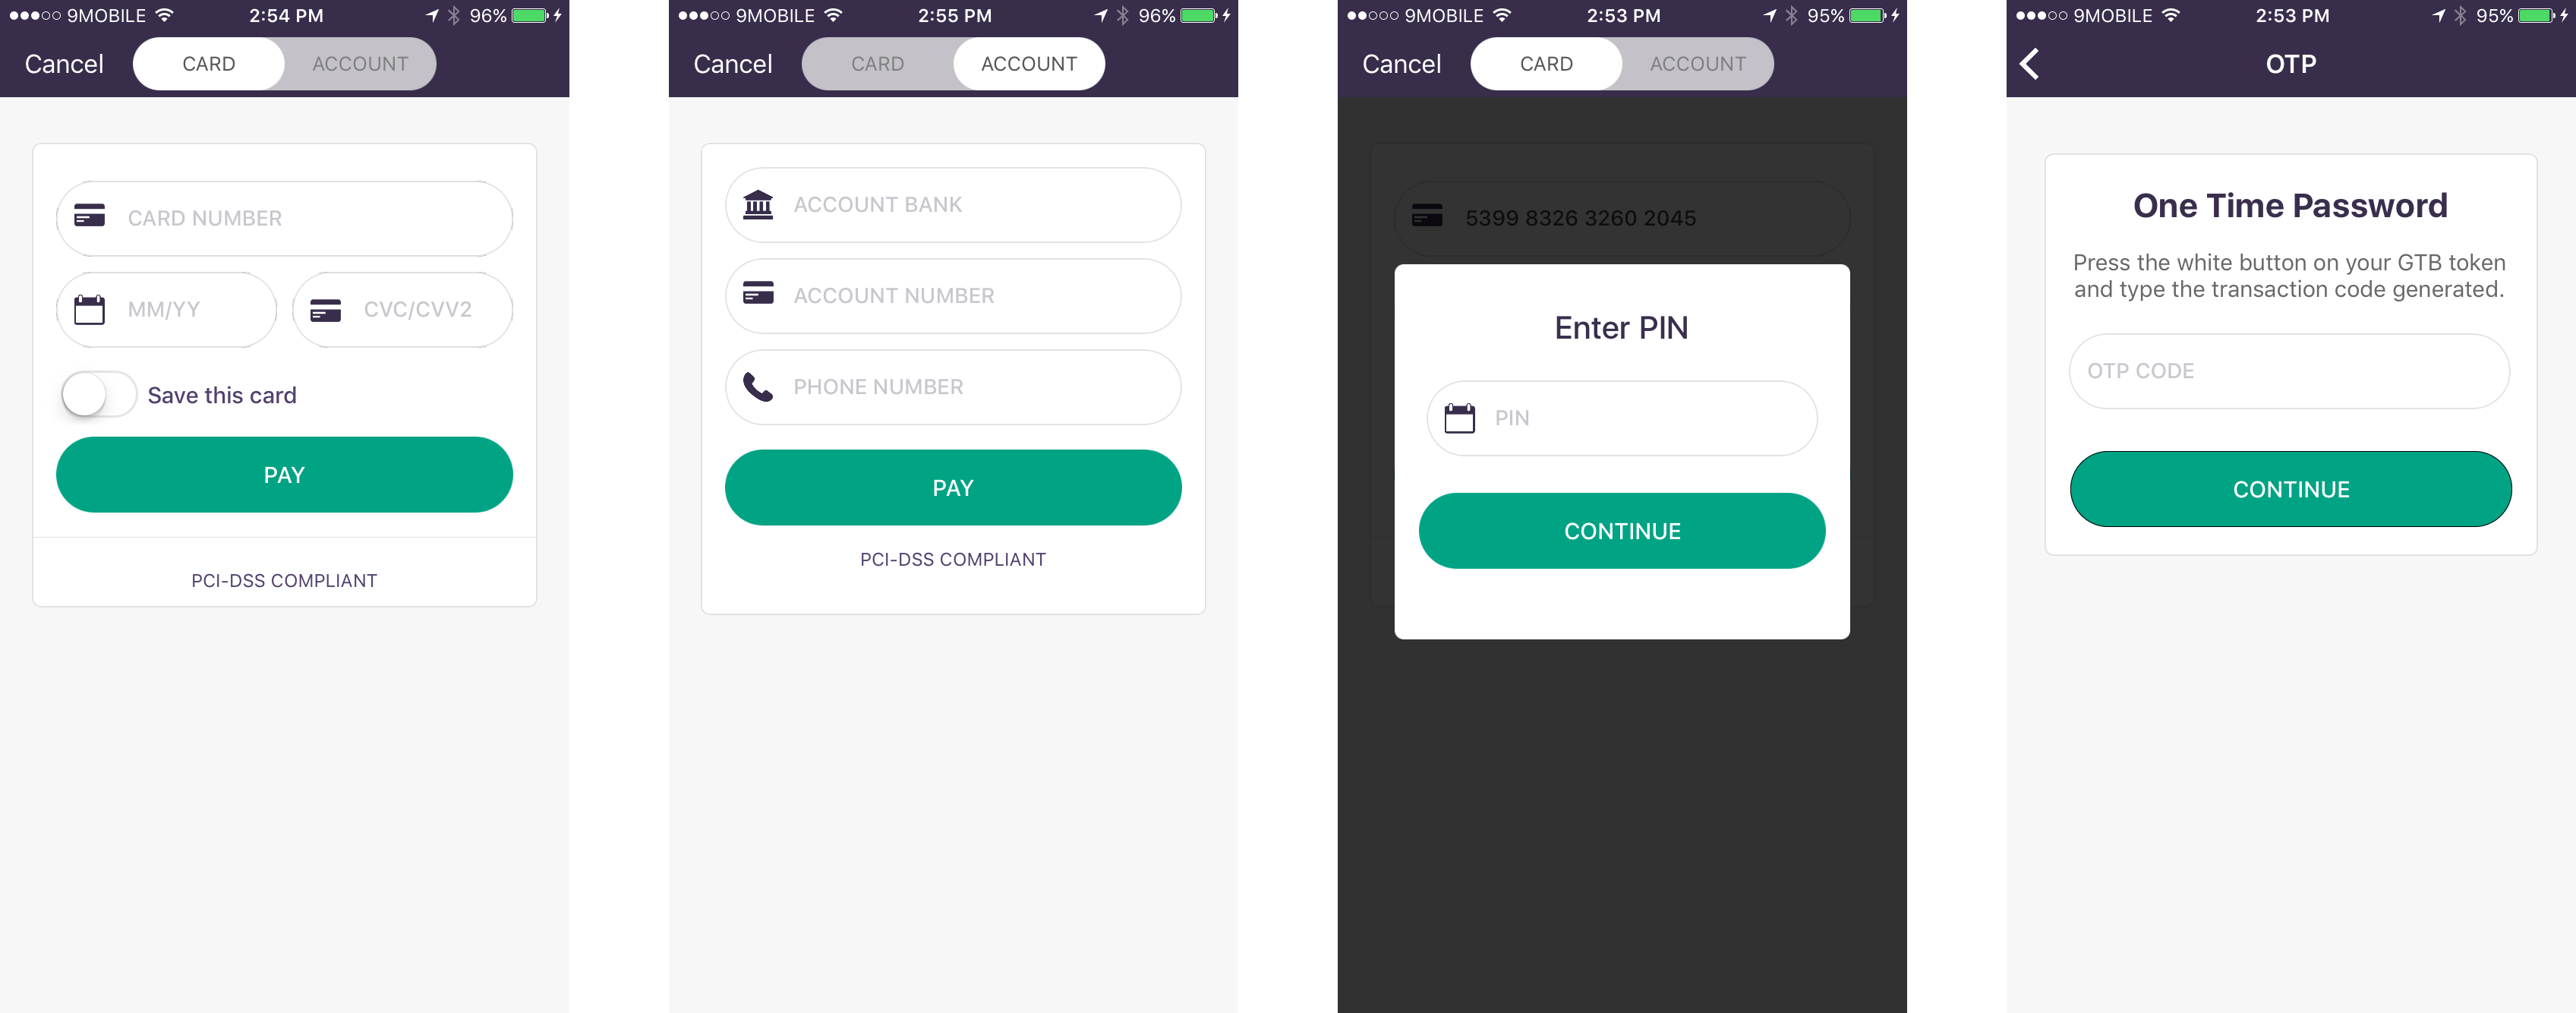
The Rave's iOS Drop-In UI

Requirements
Our SDK is compatible with iOS apps supporting iOS 10 and above. It requires Xcode 8.3+ to build the source.
Install and configure the SDK
To install the RaveSDK you need to have Cocoapods installed on you Mac. If you don't have it installed you can paste the following code snippet in your Terminal
sudo gem install cocoapods
Next clone the RaveSDK Repository
git clone https://github.com/Flutterwave/Rave.git
Now the RaveSDK requires these third party plugins to be already installed on your in your Project. (IQKeyboardManagerSwift, Alamofire, SwiftValidator, BSErrorMessageView, KVNProgress ,PopupDialog, Shimmer). So add these to your project's PodFile
pod 'IQKeyboardManagerSwift'
    pod 'Alamofire'
    pod 'SwiftValidator', :git =>
    'https://github.com/jpotts18/SwiftValidator.git', :branch => 'master'
    pod 'BSErrorMessageView', :git =>     'https://github.com/BenjaminSarkisyan/BSErrorMessageView.git'
    pod 'KVNProgress', '~> 2.3.1'
    pod 'PopupDialog'
    pod 'Shimmer'
    pod  'CreditCardValidator'
Install the added pods
pod install
Now navigate to your RaveSDK folder am make sure the RaveSDK project is not opened on Xcode.
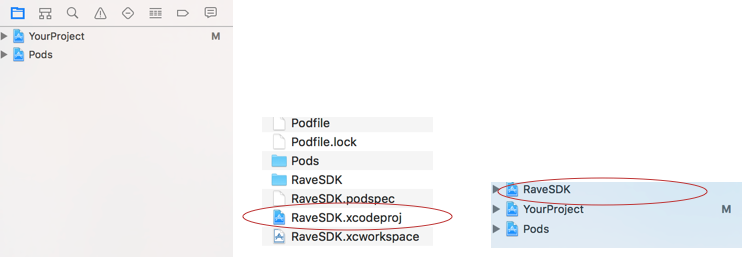
Click and drag the RaveSDK.xcodeproj to your project as shown below

Now select the RaveSDK project "RaveSDK > General > Linked Frameworks and Library" and add all the pod frameworks you installed

Note
Make sure you remove the Pods_RaveSDK.framework file
Now Select your project "YourProjectName > General >Embedded Binaries" and add the RaveSDK.framework

Build your project and yay! you are setup to start using the Rave SDK
Configure your Rave integration in your App Delegate
After you're done installing the SDK, configure it with your Rave API keys.
import UIKit
import RaveSDK

@UIApplicationMain
class AppDelegate: UIResponder, UIApplicationDelegate {

    var window: UIWindow?


    func application(_ application: UIApplication, didFinishLaunchingWithOptions launchOptions: [UIApplicationLaunchOptionsKey: Any]?) -> Bool {

        let config = RavePayConfig.sharedConfig()
        config.publicKey = "YOUR_PUB_KEY_HERE"
        config.secretKey = "YOUR_SEC_KEY_HERE"

        config.isStaging = true // Default is true
        return true
    }
Security Alert
You should never store your SECRET KEY on the user's device
Usage
import UIKit
import Rave

class ExampleViewController: UIViewController,RavePaymentManagerDelegate{

func showRaveView(){
        let raveMgr = RavePayManager()
        raveMgr.email = "[email protected]" //Customer's email address
        raveMgr.amount = "25" // Amount
        raveMgr.transcationRef = "Unique-Transaction-ref" //Unique transaction reference
        raveMgr.currencyCode = "NGN"
        raveMgr.delegate = self
        raveMgr.narration = "narration"
        raveMrg.supportedPaymentMethods = [.card,.account] // Choose supported payment channel allowed
        //Set your recurring payment ID, Only set this if you are enabling recurring payments
        //raveMgr.paymentPlan = <PAYMENT PLAN ID>

        raveMgr.show(withController:self)
    }

 func ravePaymentManagerDidCancel(_ ravePaymentManager: RavePayManager) {

 }
 func ravePaymentManager(_ ravePaymentManager: RavePayManager, didSucceedPaymentWithResult result: [String : AnyObject]) {

    }
 func ravePaymentManager(_ ravePaymentManager: RavePayManager, didFailPaymentWithResult result: [String : AnyObject]) {

    }
}
App Transport Security
Please note that you need to set your App Transport Security in your project Info.plist file to enable Arbitrary Loads
Styling
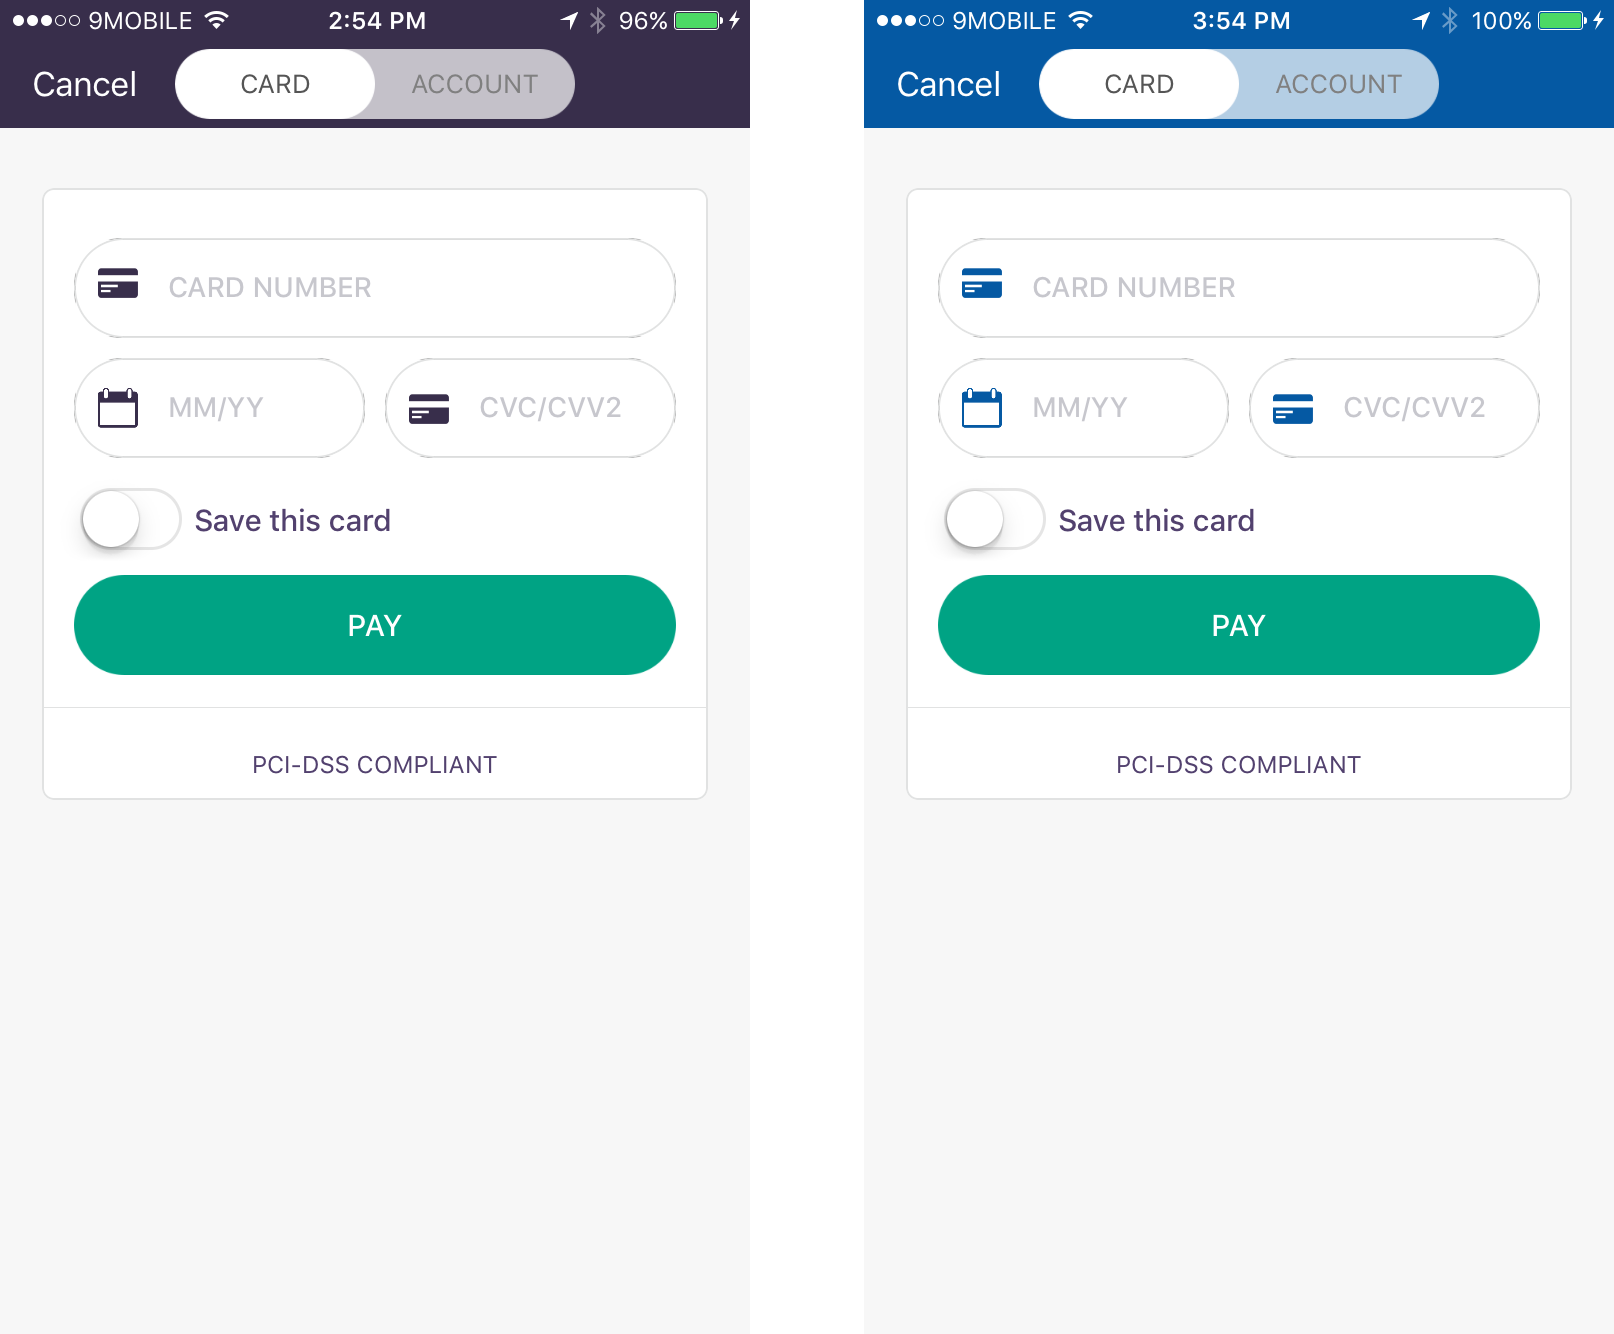
Changing The Default Theme Color
In your AppDelegate.swift file set the themeColor property on your configuration shared instance .
config.themeColor = UIColor.blue

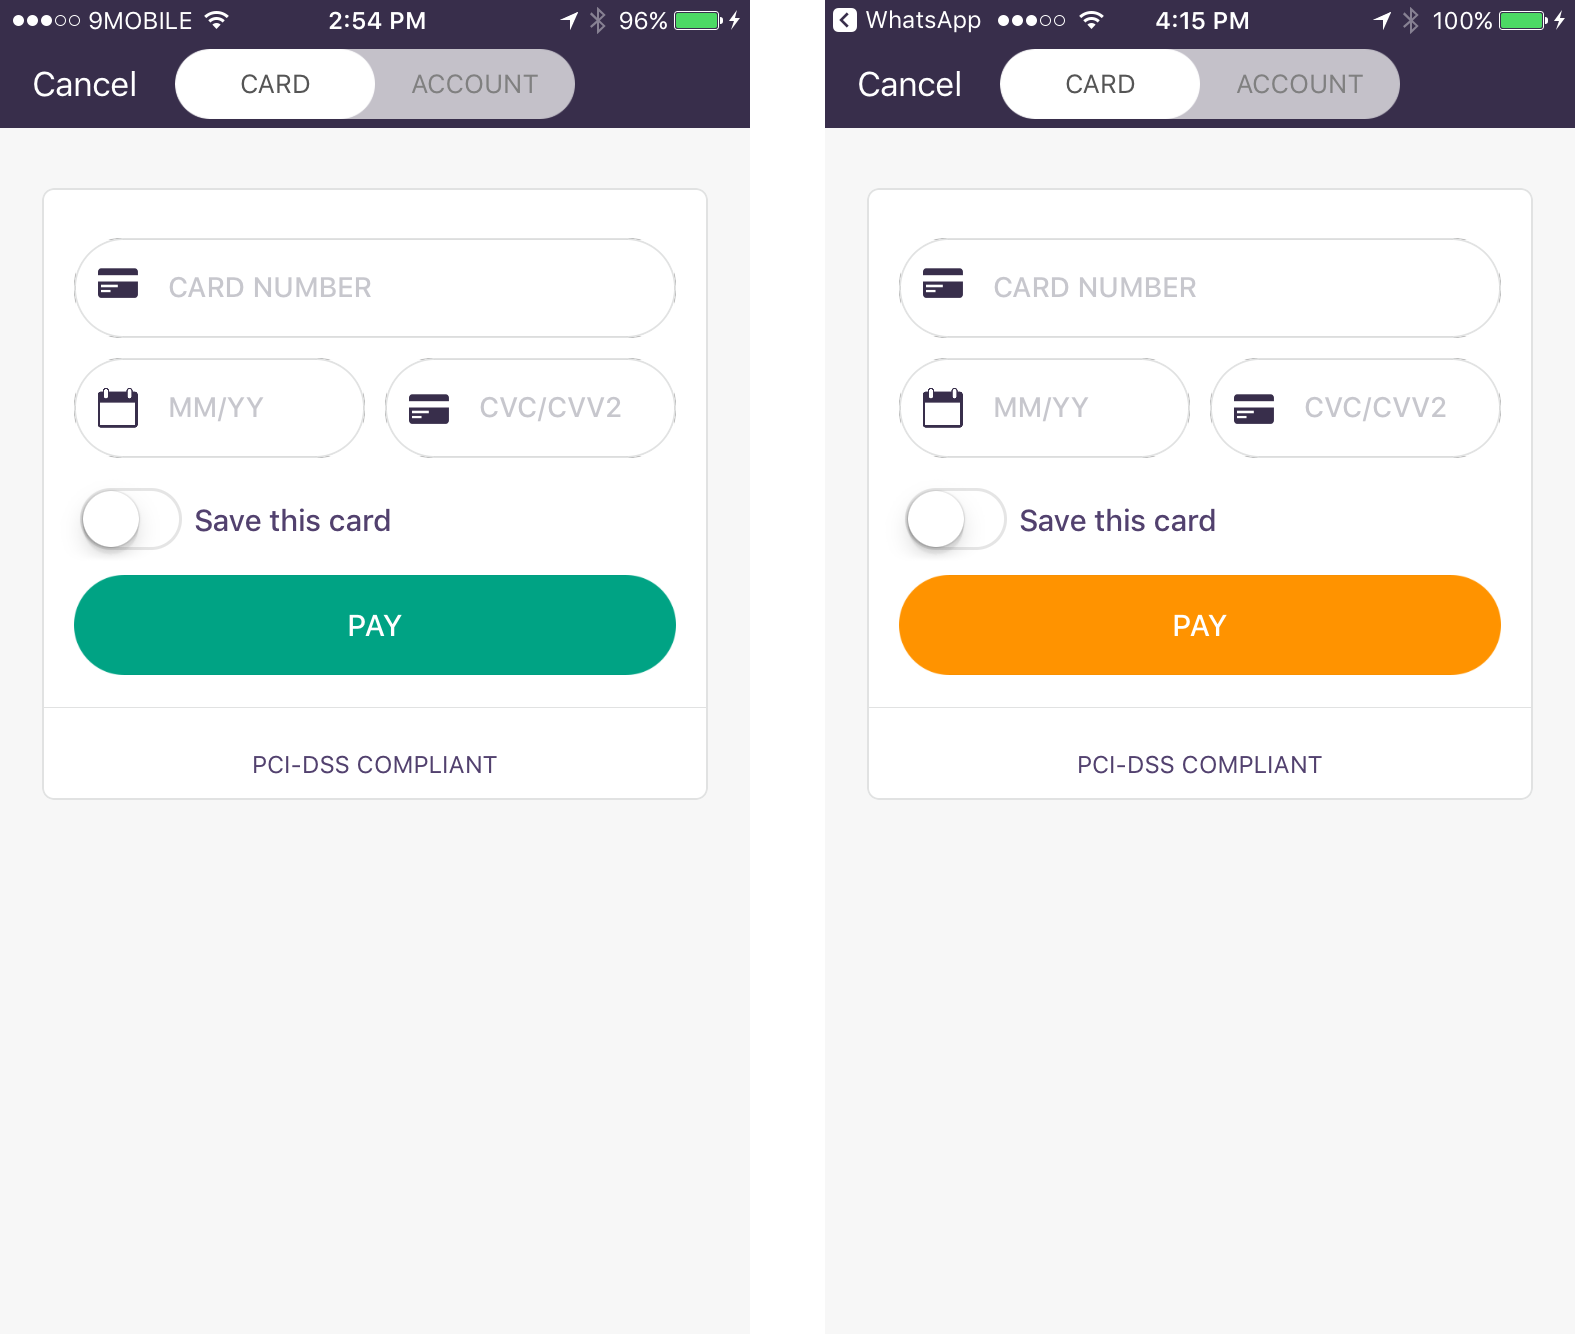
Button Theme Color
config.buttonThemeColor = UIColor.orange

Updated almost 7 years ago
