Charging a Card
Quickly charge a customer's card
Follow these steps to charge a customer's card on your account.
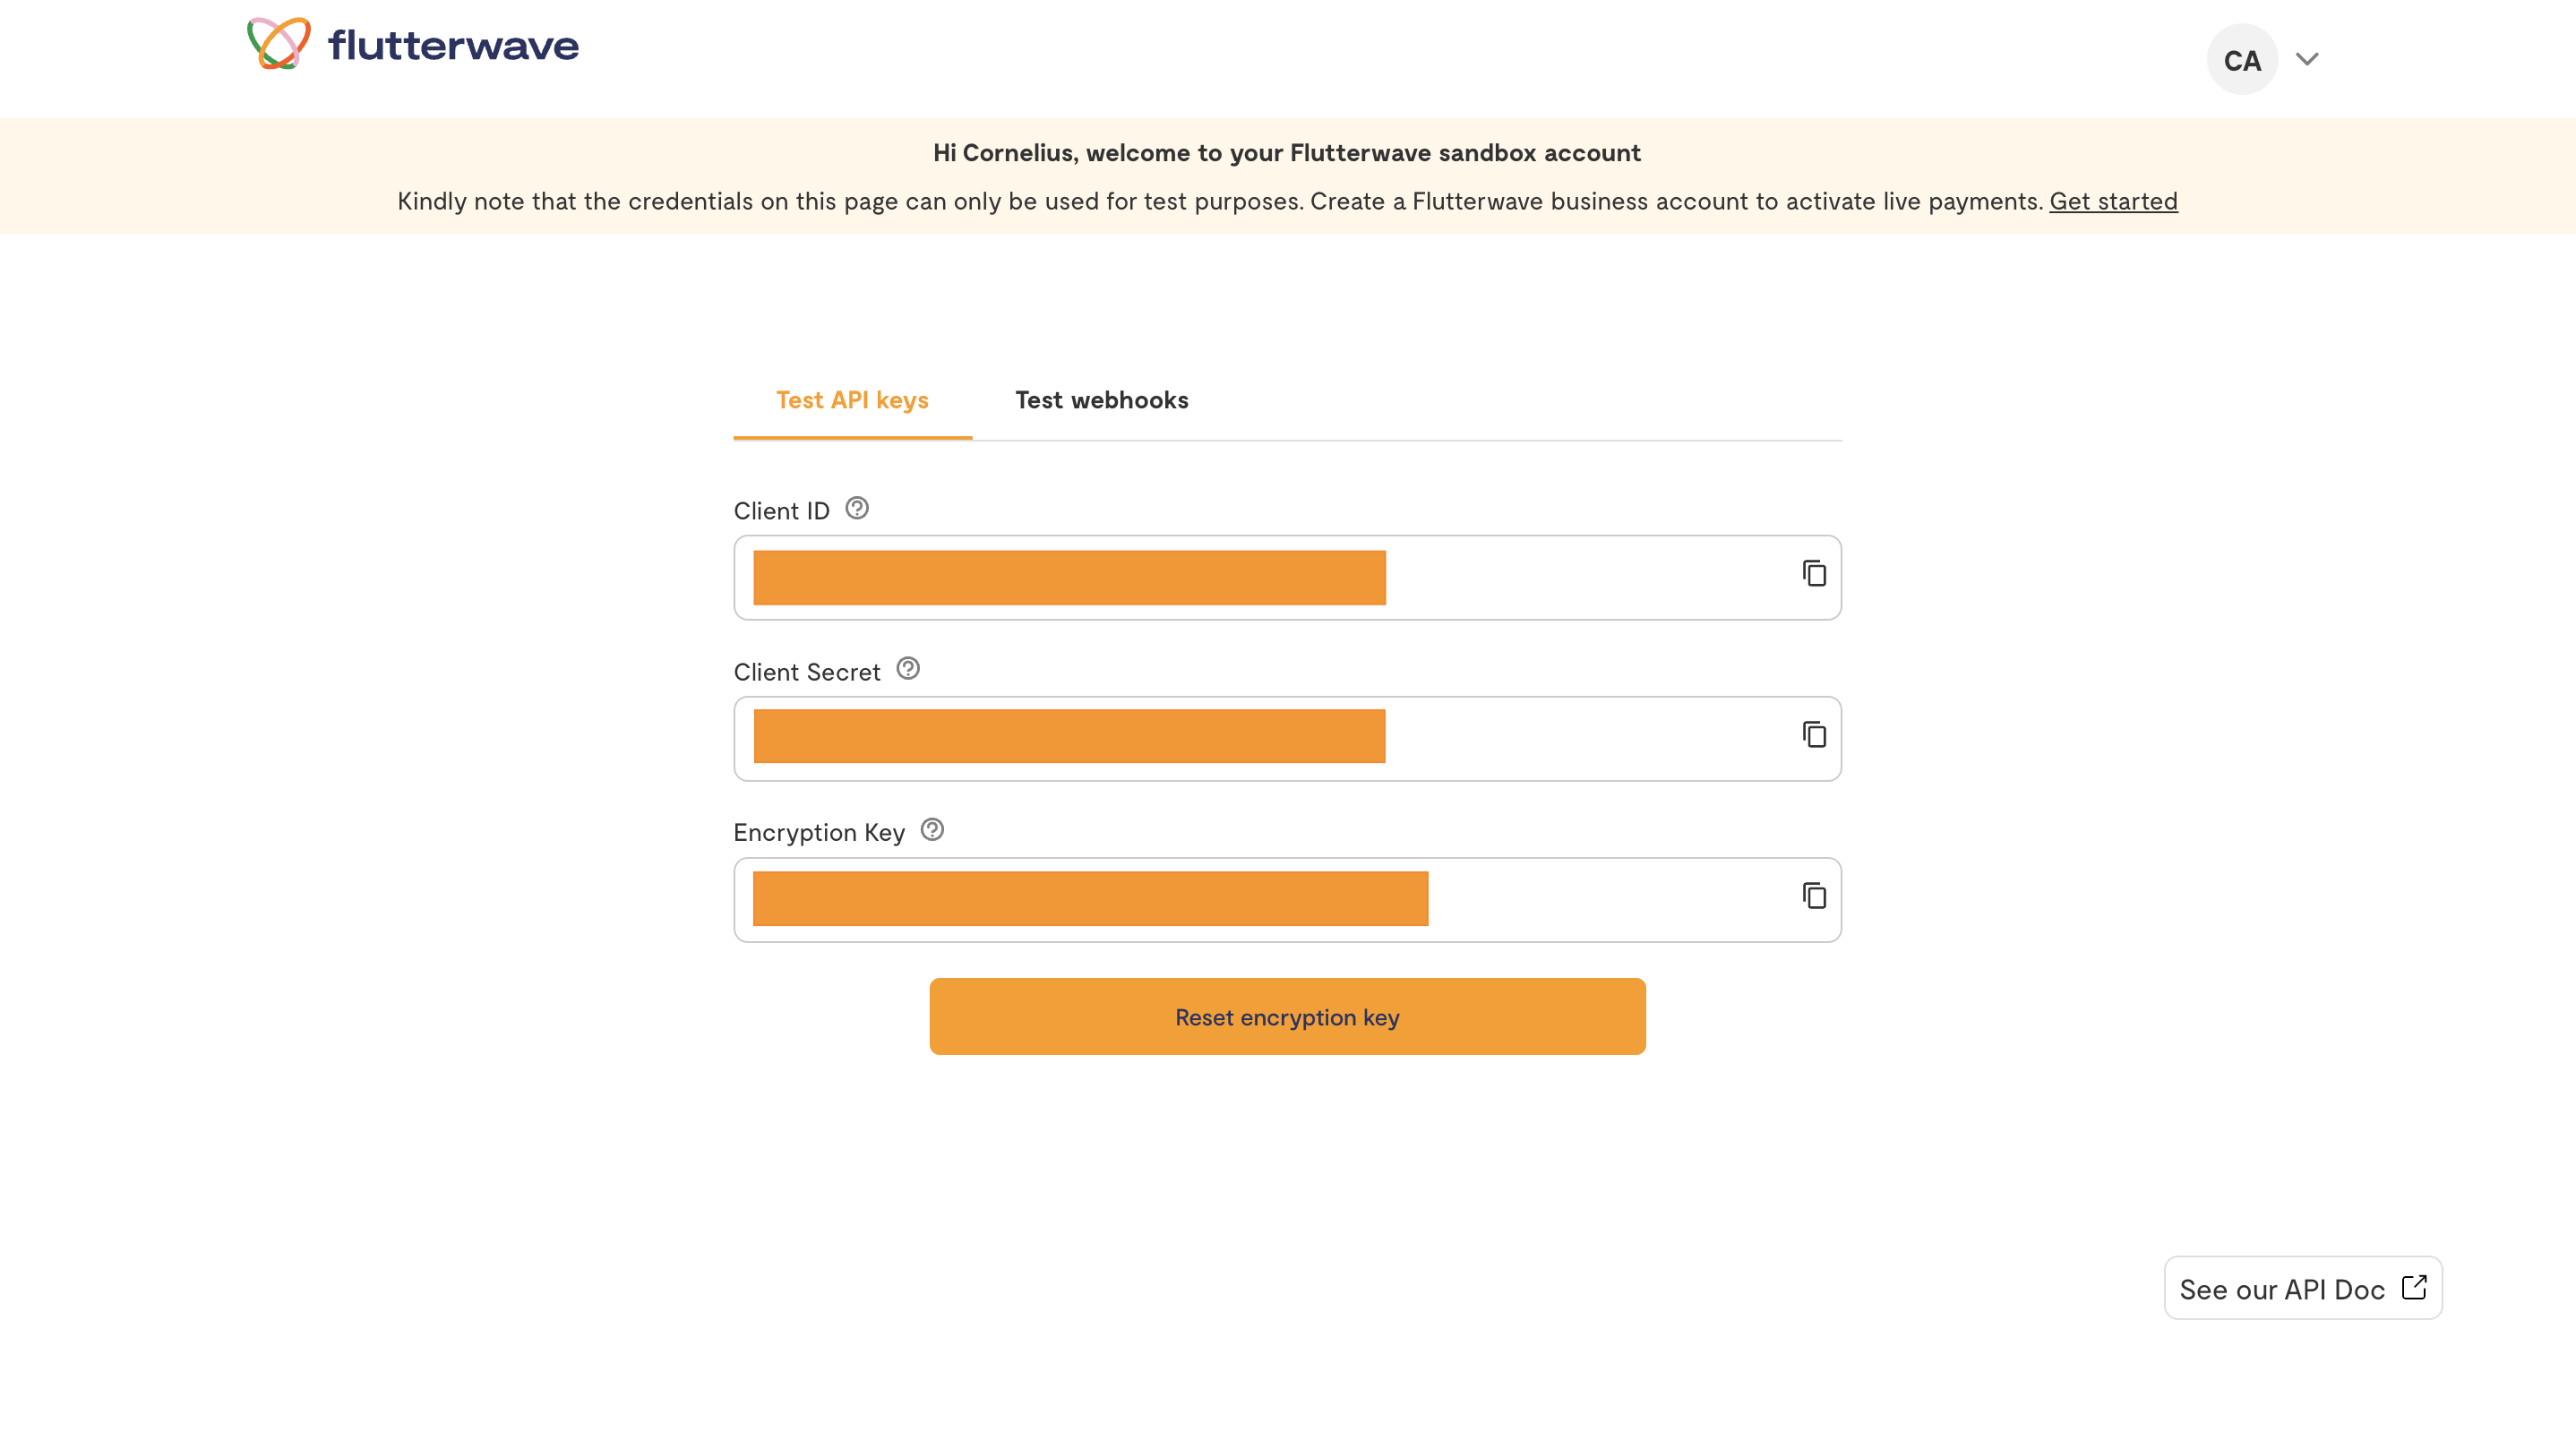
1. Retrieve Test API Credentials
- Log in to your developer account to access your test credentials.
- Copy your API credentials from the main dashboard.
2. Generate Access Token
Send your Client-Id and Client-Secret to our authentication endpoint to generate your access token. Each token is valid for 10 minutes, after which you should generate a new token.
curl -X POST 'https://idp.flutterwave.com/realms/flutterwave/protocol/openid-connect/token' \
--header 'Content-Type: application/x-www-form-urlencoded' \
--data-urlencode 'client_id={{CLIENT_ID}}' \
--data-urlencode 'client_secret={{CLIENT_SECRET}}' \
--data-urlencode 'grant_type=client_credentials'
{
    "access_token": "SAMPLE_TOKEN",
    "expires_in": 600,
    "refresh_expires_in": 0,
    "token_type": "Bearer",
    "not-before-policy": 0,
    "scope": "profile email"
}
3. Create a Customer Object
Create an entity to store the customer's details; this object links customer information to payment data.
curl --request POST \
--url 'https://developersandbox-api.flutterwave.com/customers' \
--header 'Authorization: Bearer {{YOUR_ACCESS_TOKEN}}' \
--header 'Content-Type: application/json' \
--header 'X-Trace-Id: {{YOUR_UNIQUE_TRACE_ID}}' \
--data '{
  "address": {
    "city": "Gotham",
    "country": "US",
    "line1": "221B Baker Street",
    "line2": "",
    "postal_code": "94105",
    "state": "Colorado"
  },
  "name": {
    "first": "King",
    "middle": "Leo",
    "last": "James"
  },
  "phone": {
    "country_code": "1",
    "number": "6313958745"
  },
  "email": "[email protected]"
}'
{
    "status": "success",
    "message": "Customer created",
    "data": {
        "id": "cus_J0PvwvJB2n",
        "address": {
            "city": "Gotham",
            "country": "US",
            "line1": "221B Baker Street",
            "line2": "",
            "postal_code": "94105",
            "state": "Colorado"
        },
        "email": "[email protected]",
        "name": {
            "first": "King",
            "middle": "Leo",
            "last": "James"
        },
        "phone": {
            "country_code": "1",
            "number": "6313958745"
        },
        "meta": {},
        "created_datetime": "2024-12-03T13:54:21.546559974Z"
    }
}
4. Collect and Encrypt the Card Information
Encrypt the customer's card number, expiry date and CVV using AES-256. You'll need to provide your encryption nonce to us to validate your encryption.
export async function encryptAES(data: string, token: string, nonce: string): Promise<string> {
    if (nonce.length !== 12) {
        throw new Error("Nonce must be exactly 12 characters long");
    }

    const cryptoSubtle = globalThis.crypto?.subtle || require("crypto").webcrypto?.subtle;
    if (!cryptoSubtle) {
        throw new Error("Crypto API is not available in this environment.");
    }

    const decodedKeyBytes = Uint8Array.from(atob(token), c => c.charCodeAt(0));

    const key = await cryptoSubtle.importKey(
        "raw",
        decodedKeyBytes,
        { name: "AES-GCM" },
        false,
        ["encrypt"]
    );
    const iv = new TextEncoder().encode(nonce);

    const encryptedData = await cryptoSubtle.encrypt(
        {
            name: "AES-GCM",
            iv: iv,
        },
        key,
        new TextEncoder().encode(data)
    );

    return btoa(String.fromCharCode(...new Uint8Array(encryptedData)));
}
5. Create a Card Object
Use the encrypted card information to create a card object using the payment method endpoint.
curl --request POST \
--url 'https://developersandbox-api.flutterwave.com/payment-methods' \
--header 'Authorization: Bearer {{YOUR_ACCESS_TOKEN}}' \
--header 'Content-Type: application/json' \
--header 'X-Trace-Id: {{YOUR_UNIQUE_TRACE_ID}}' \
--header 'X-Idempotency-Key: {{YOUR_UNIQUE_INDEMPOTENCY_KEY}}' \
--data '{
    "type": "card",
    "card": {
        "encrypted_card_number": "{{$encrypted_card_number}}",
        "encrypted_expiry_month": "{{$encrypted_expiry_month}}",
        "encrypted_expiry_year": "{{$encrypted_expiry_year}}",
        "encrypted_cvv": "{{$encrypted_cvv}}",
        "nonce": "{{$randomly_generated_nonce}}"
    }
}'
{
    "status": "success",
    "message": "Payment method created",
    "data": {
        "type": "card",
        "card": {
            "expiry_month": 8,
            "expiry_year": 32,
            "first6": "123412",
            "last4": "2222",
            "network": "mastercard"
        },
        "id": "pmd_wlVhaYmkl2",
        "meta": {},
        "created_datetime": "2024-12-03T14:29:26.650973145Z"
    }
}
Store the id of the card object as it would be useful for recurrent charges.
6. Charge the Card
Send the card ID, customer ID and transaction information like amount, currency and reference to the charge endpoint.
curl --request POST \
--url 'https://developersandbox-api.flutterwave.com/charges' \
--header 'Authorization: Bearer {{YOUR_ACCESS_TOKEN}}' \
--header 'Content-Type: application/json' \
--header 'X-Trace-Id: {{YOUR_UNIQUE_TRACE_ID}}' \
--header 'X-Scenario-Key: scenario:auth_3ds&issuer:approved' \
--header 'X-Idempotency-Key: {{YOUR_UNIQUE_INDEMPOTENCY_KEY}}' \
--data '{
   "reference": "cedfa85a-a803-4a06-a586-0f81fb9b9f22",
   "currency": "NGN",
   "customer_id": "cus_IpH7CKCUtD",
   "payment_method_id": "pmd_wlVhaYmkl2",
   "redirect_url":"https://google.com",
   "amount": 2500,
   "meta":{
     "person_name": "King James",
     "role": "Developer"
   }
 }
'
{
    "status": "pending",
    "message": "Charge requires authorization",
    "data": {
        "id": "chg_VoUhmFMhmF",
        "status": "pending",
        "next_action": {
            "type": "authorize",
            "authorization": {
                "type": "pin"
            }
        },
        ...
    }
}
Update the charge request with the customer's pin. Use the mock value 12345 to complete your charge, Encrypt the pin before passing it to your request.
curl --location --request PUT 'https://developersandbox-api.flutterwave.com/charges/{{CHARGE_ID}}' \
--header 'Authorization: Bearer {{YOUR_ACCESS_TOKEN}}' \
--header 'X-Trace-Id: {{YOUR_UNIQUE_TRACE_ID}}' \
--header 'X-Scenario-Key: scenario:auth_3ds&issuer:approved' \
--header 'Content-type: application/json' \
--data '{
    "authorization": {
        "type": "pin",
        "pin": {
            "nonce": "{{YOUR_PIN_NONCE}}",
            "encrypted_pin": "{{ENCRYPTED_PIN}}"
        }
    }
}'
{
    "status": "success",
    "message": "Charge created",
    "data": {
        "id": "chg_VoUhmFMhmF",
        ...
        "next_action": {
            "type": "redirect_url",
            "redirect_url": {
                "url": "https://developer-sandbox-ui-sit.flutterwave.cloud/redirects?card&token=eyJhbGciOiJIUzI1NiJ9.eyJjbGllbnRJZCI6ImFjODMxOTNlLWFhMmItNDc2ZS1hZTNjLTMxYmVmMTc4NDUxZCIsImNoYXJnZUlkIjoiY2hnX1JDRHNDQkR5YVYiLCJzdWIiOiJhYzgzMTkzZS1hYTJiLTQ3NmUtYWUzYy0zMWJlZjE3ODQ1MWQiLCJpYXQiOjE3MzA5NjQ1MTIsImV4cCI6MTczMDk2NDgxMn0.tMv1VZ4WevvZ_dg37AzYnhj0Z1YtXK_tQIOJcErNscI"
            }
        },
        "payment_method_details": {},
        "status": "pending",
        ...
    }
}
Redirect the customer to their bank page(response.data.next_action.redirect_url.url) to authorize the payment.
Once the payment is completed, we send you a charge.completed event via webhooks.
{
   "webhook_id":"wbk_yXvsB4LzWSwhUCpAPCBR",
   "timestamp":1739456704200,
   "type":"charge.completed",
   "data":{
      "id":"chg_VoUhmFMhmF",
      "amount":2500,
      "currency":"NGN",
      "customer":{
         "id":"cus_J0PvwvJB2n",
         "address":{
            "city":"Gotham",
            "country":"US",
            "line1":"221B Baker Street",
            "line2":"",
            "postal_code":"94105",
            "state":"Colorado"
         },
         "email":"[email protected]",
         "name":{
            "first":"King",
            "middle":"Leo",
            "last":"James"
         },
         "phone":{
            "country_code":"1",
            "number":"6313958745"
         },
         "meta":{},
         "created_datetime":"2024-12-25T20:16:38.246Z"
      },
      "description":null,
      "meta":{},
      "payment_method":{
         "type":"card",
         "card":{
            "expiry_month":8,
            "expiry_year":32,
            "first6":"123412",
            "last4":"2222",
            "network":"MASTERCARD",
            "billing_address":null,
            "cof":null,
            "card_holder_name":null
         },
         "id":"pmd_wlVhaYmkl2",
         "customer_id":null,
         "meta":{},
         "device_fingerprint":null,
         "client_ip":null,
         "created_datetime":"2025-02-05T14:06:10.344Z"
      },
      "redirect_url":null,
      "reference":"cedfa85a-a803-4a06-a586-0f81fb9b9f22",
      "status":"succeeded",
      "processor_response":{
         "type":"approved",
         "code":"00"
      },
      "created_datetime":"2025-02-13T14:24:43.133Z"
   }
}
Updated 8 months ago