
Pay with Bank (NG)
Debit your Customer's Bank account
Pay with Bank (PWB), also referred to as direct debit, provides a seamless, reliable option for customers to complete transactions directly from their bank accounts using Mono's bank connection page.
Feature Availability
This payment method is only available for NGN (Nigerian Naira) collections.
Requirements
You should ensure that these requirements are met before you proceed to integrate this feature:
- Read the introduction before you continue with this guide.
- Retrieve your API keys from your dashboard.
- Configure your webhooks to manage payment status updates.
How PWB payments work.
When a customer chooses to pay using the bank account payment method, they are redirected to Mono's secure authorization page. From Mono's page, the customer selects their bank from a list of supported financial institutions and authorizes the transaction using the method supported by their bank, such as internet banking, mobile banking, OTP, a hardware token, or bank USSD code.
Once authorized, the bank debits the customer's account, and the customer is redirected back to your specified redirect_url while Flutterwave sends a successful webhook to your server.
Payment Flow
To collect payments from customers using Pay With Bank Account, follow these steps:
- Collect the customer's information to initiate the charge. Providing an
emailis required, while thename,address, andphoneare optional at this stage. - Create the bank account payment method by specifying the
typeasbank_account. - Create the charge by specifying the
customer_id,payment_method_id,amount,reference,currency, andredirect_url. - Redirect the customer to the URL returned in the
data.next_action.redirect_url(Mono's page) object to select their respective banks and authorize the payment. - Verify the payment
status,amount,customer_idandtransaction_idusing webhooks and the retrieve a charge API before providing the value to the customer.
Steps to collecting bank account payments with Flutterwave.
Integration method
This guide follows the general integration flow. Please refer to the orchestrator flow for the alternative integration method.
Step 1: Create a customer
To create a new customer, send a request to the create customer endpoint including the name, email, phone, address, etc. Only the customer's email is required to create a customer entity; however, we recommend that you collect as much information as you can.
You can also use the retrieve a customer endpoint to query and fetch a customer's information. This is helpful if you wish to initiate charges for returning or existing customers.
curl --request POST \
  --url 'https://developersandbox-api.flutterwave.com/customers' \
  --header 'Authorization: Bearer {{YOUR_ACCESS_TOKEN}}' \
  --header 'Content-Type: application/json' \
  --header 'X-Trace-Id: {{YOUR_UNIQUE_TRACE_ID}}' \
  --header 'X-Idempotency-Key: {{YOUR_UNIQUE_IDEMPOTENCY_KEY}}' \
  --data '{
    "address": {
      "city": "Gotham",
      "country": "US",
      "line1": "221B Baker Street",
      "line2": "321B Hazard Avenue",
      "postal_code": "94105",
      "state": "Colorado"
    },
    "name": {
      "first": "Derek",
      "middle": "Jones",
      "last": "Blue"
    },
    "phone": {
      "country_code": "233",
      "number": "9012345678"
    },
    "email": "[email protected]"
  }'
{
    "status": "success",
    "message": "Customer created",
    "data": {
        "id": "cus_Gh5xysiG40",
        "address": {
            "city": "Gotham",
            "country": "US",
            "line1": "221B Baker Street",
            "line2": "321B Hazard Avenue",
            "postal_code": "94105",
            "state": "Colorado"
        },
        "email": "[email protected]",
        "name": {
            "first": "Derek",
            "middle": "Jones",
            "last": "Blue"
        },
        "phone": {
            "country_code": "233",
            "number": "9012345678"
        },
        "meta": {},
        "created_datetime": "2026-08-07T14:41:52.180Z"
    }
}
Step 2: Create a bank account payment method
Create a Bank Account payment method by sending a request to the create a payment method endpoint. In your request, set the type to bank_account.
curl --request POST \
  --url 'https://developersandbox-api.flutterwave.com/payment-methods' \
  --header 'Authorization: Bearer {{YOUR_ACCESS_TOKEN}}' \
  --header 'Content-Type: application/json' \
  --header 'X-Trace-Id: {{YOUR_UNIQUE_TRACE_ID}}' \
  --header 'X-Idempotency-Key: {{YOUR_UNIQUE_IDEMPOTENCY_KEY}}' \
  --data '{
    "type": "bank_account",
    "bank_account": {}
  }'
{
    "status": "success",
    "message": "Payment method created",
    "data": {
        "type": "bank_account",
        "bank_account": {},
        "id": "pmd_kB7xcrobND",
        "meta": {},
        "created_datetime": "2026-08-07T14:48:08.770Z"
    }
}
Step 3: Create Charge.
Create the Bank Account charge by sending a request to the create a charge endpoint with the following parameters:
- customer_id: The
data.idreturned from Step 1(customer creation). - payment_method_id: The
data.idreturned from Step 2(payment method creation). - Transaction details including:
amount,redirect_url,currency, and a uniquereferencefor the transaction.
curl --request POST \
  --url 'https://developersandbox-api.flutterwave.com/charges' \
  --header 'Authorization: Bearer {{YOUR_ACCESS_TOKEN}}' \
  --header 'Content-Type: application/json' \
  --header 'X-Trace-Id: {{YOUR_UNIQUE_TRACE_ID}}' \
  --header 'X-Idempotency-Key: {{YOUR_UNIQUE_IDEMPOTENCY_KEY}}' \
  --data '{
    "reference": "185878aa-5647-47b6-b4d5-2f34bf596814",
    "currency": "NGN",
    "customer_id": "cus_Gh5xysiG40",
    "payment_method_id": "pmd_kB7xcrobND",
    "redirect_url": "https://flutterwave.com/",
    "amount": 250,
    "meta": {
      "person_name": "Derek Jones",
      "role": "Developer"
    }
  }'
{
    "status": "success",
    "message": "Charge created",
    "data": {
        "id": "chg_SCmmjzx9Vf",
        "amount": 250,
        "fees": [
            {
                "type": "vat",
                "amount": 0
            },
            {
                "type": "app",
                "amount": 0
            },
            {
                "type": "merchant",
                "amount": 0
            },
            {
                "type": "stamp_duty",
                "amount": 0
            }
        ],
        "currency": "NGN",
        "customer_id": "cus_Gh5xysiG40",
        "settled": false,
        "settlement_id": [],
        "meta": {
            "person_name": "Derek Jones",
            "role": "Developer"
        },
        "next_action": {
            "type": "redirect_url",
            "redirect_url": {
                "url": "https://developersandbox.flutterwave.com/redirects?bank_account&token=eyJhbGciOiJIUzI1NiJ9.eyJjbGllbnRJZCI6IjQ0OTllNjBiLThkYzgtNDdlMy05ZDYyLWQwOTUyNjA1ZTYyOSIsImNoYXJnZUlkIjoiY2hnX1NDbW1qeng5VmYiLCJzdWIiOiI0NDk5ZTYwYi04ZGM4LTQ3ZTMtOWQ2Mi1kMDk1MjYwNWU2MjkiLCJpYXQiOjE3ODYxMTM5NDUsImV4cCI6MTc4NjExNDI0NX0.V0gqfYqugfHmRX1Dcb4HA_HErmkyfAz16-xMSZWrKho"
            }
        },
        "payment_method_details": {
            "type": "bank_account",
            "bank_account": {},
            "id": "pmd_G6oIU2NQ9R",
            "meta": {},
            "created_datetime": "2026-08-07T14:44:34.123Z"
        },
        "redirect_url": "https://flutterwave.com/",
        "reference": "TRN-cOEunIgj74os",
        "status": "pending",
        "processor_response": {
            "type": "pending",
            "code": "02"
        },
        "created_datetime": "2026-08-07T14:45:45.827Z"
    }
}
{
    "status": "failed",
    "error": {
        "type": "CURRENCY_NOT_SUPPORTED",
        "code": "1125400",
        "message": "Currency not supported for bank account charge.",
        "validation_errors": []
    }
}
Step 4: Authorise Payment
You may notice that the data.status in the response object after creating the charge is "pending", indicating the charge has not yet been completed.
{
    "status": "success",
    "message": "Charge created",
    "data": {
       ...
        "status": "pending",
       ...
           }
}
To complete the charge, redirect the customer to the URL provided in the data.next_action.redirect_url object to open Mono's page.
{
    "status": "success",
    "message": "Charge created",
    "data": {
    ...
        "next_action": {
            "type": "redirect_url",
            "redirect_url": {
                "url": "https://developer-sandbox.flutterwave.com/redirects?bank_account&token=eyJhbGciOiJIUzI1NiJ9.eyJjbGllbnRJZCI6IjQ0OTllNjBiLThkYzgtNDdlMy05ZDYyLWQwOTUyNjA1ZTYyOSIsImNoYXJnZUlkIjoiY2hnX29mTGx1SDRnNnYiLCJzdWIiOiI0NDk5ZTYwYi04ZGM4LTQ3ZTMtOWQ2Mi1kMDk1MjYwNWU2MjkiLCJpYXQiOjE3NDgwMDg1MDgsImV4cCI6MTc0ODAwODgwOH0.CfqeQgfrCNeod8GyOpnRp1Gj8eed0WksRLrCkvH1sn8"
            }
        }
   ...
    }
}
On Mono's page, the customer will select their bank from the list of supported banks and authorize the payment.
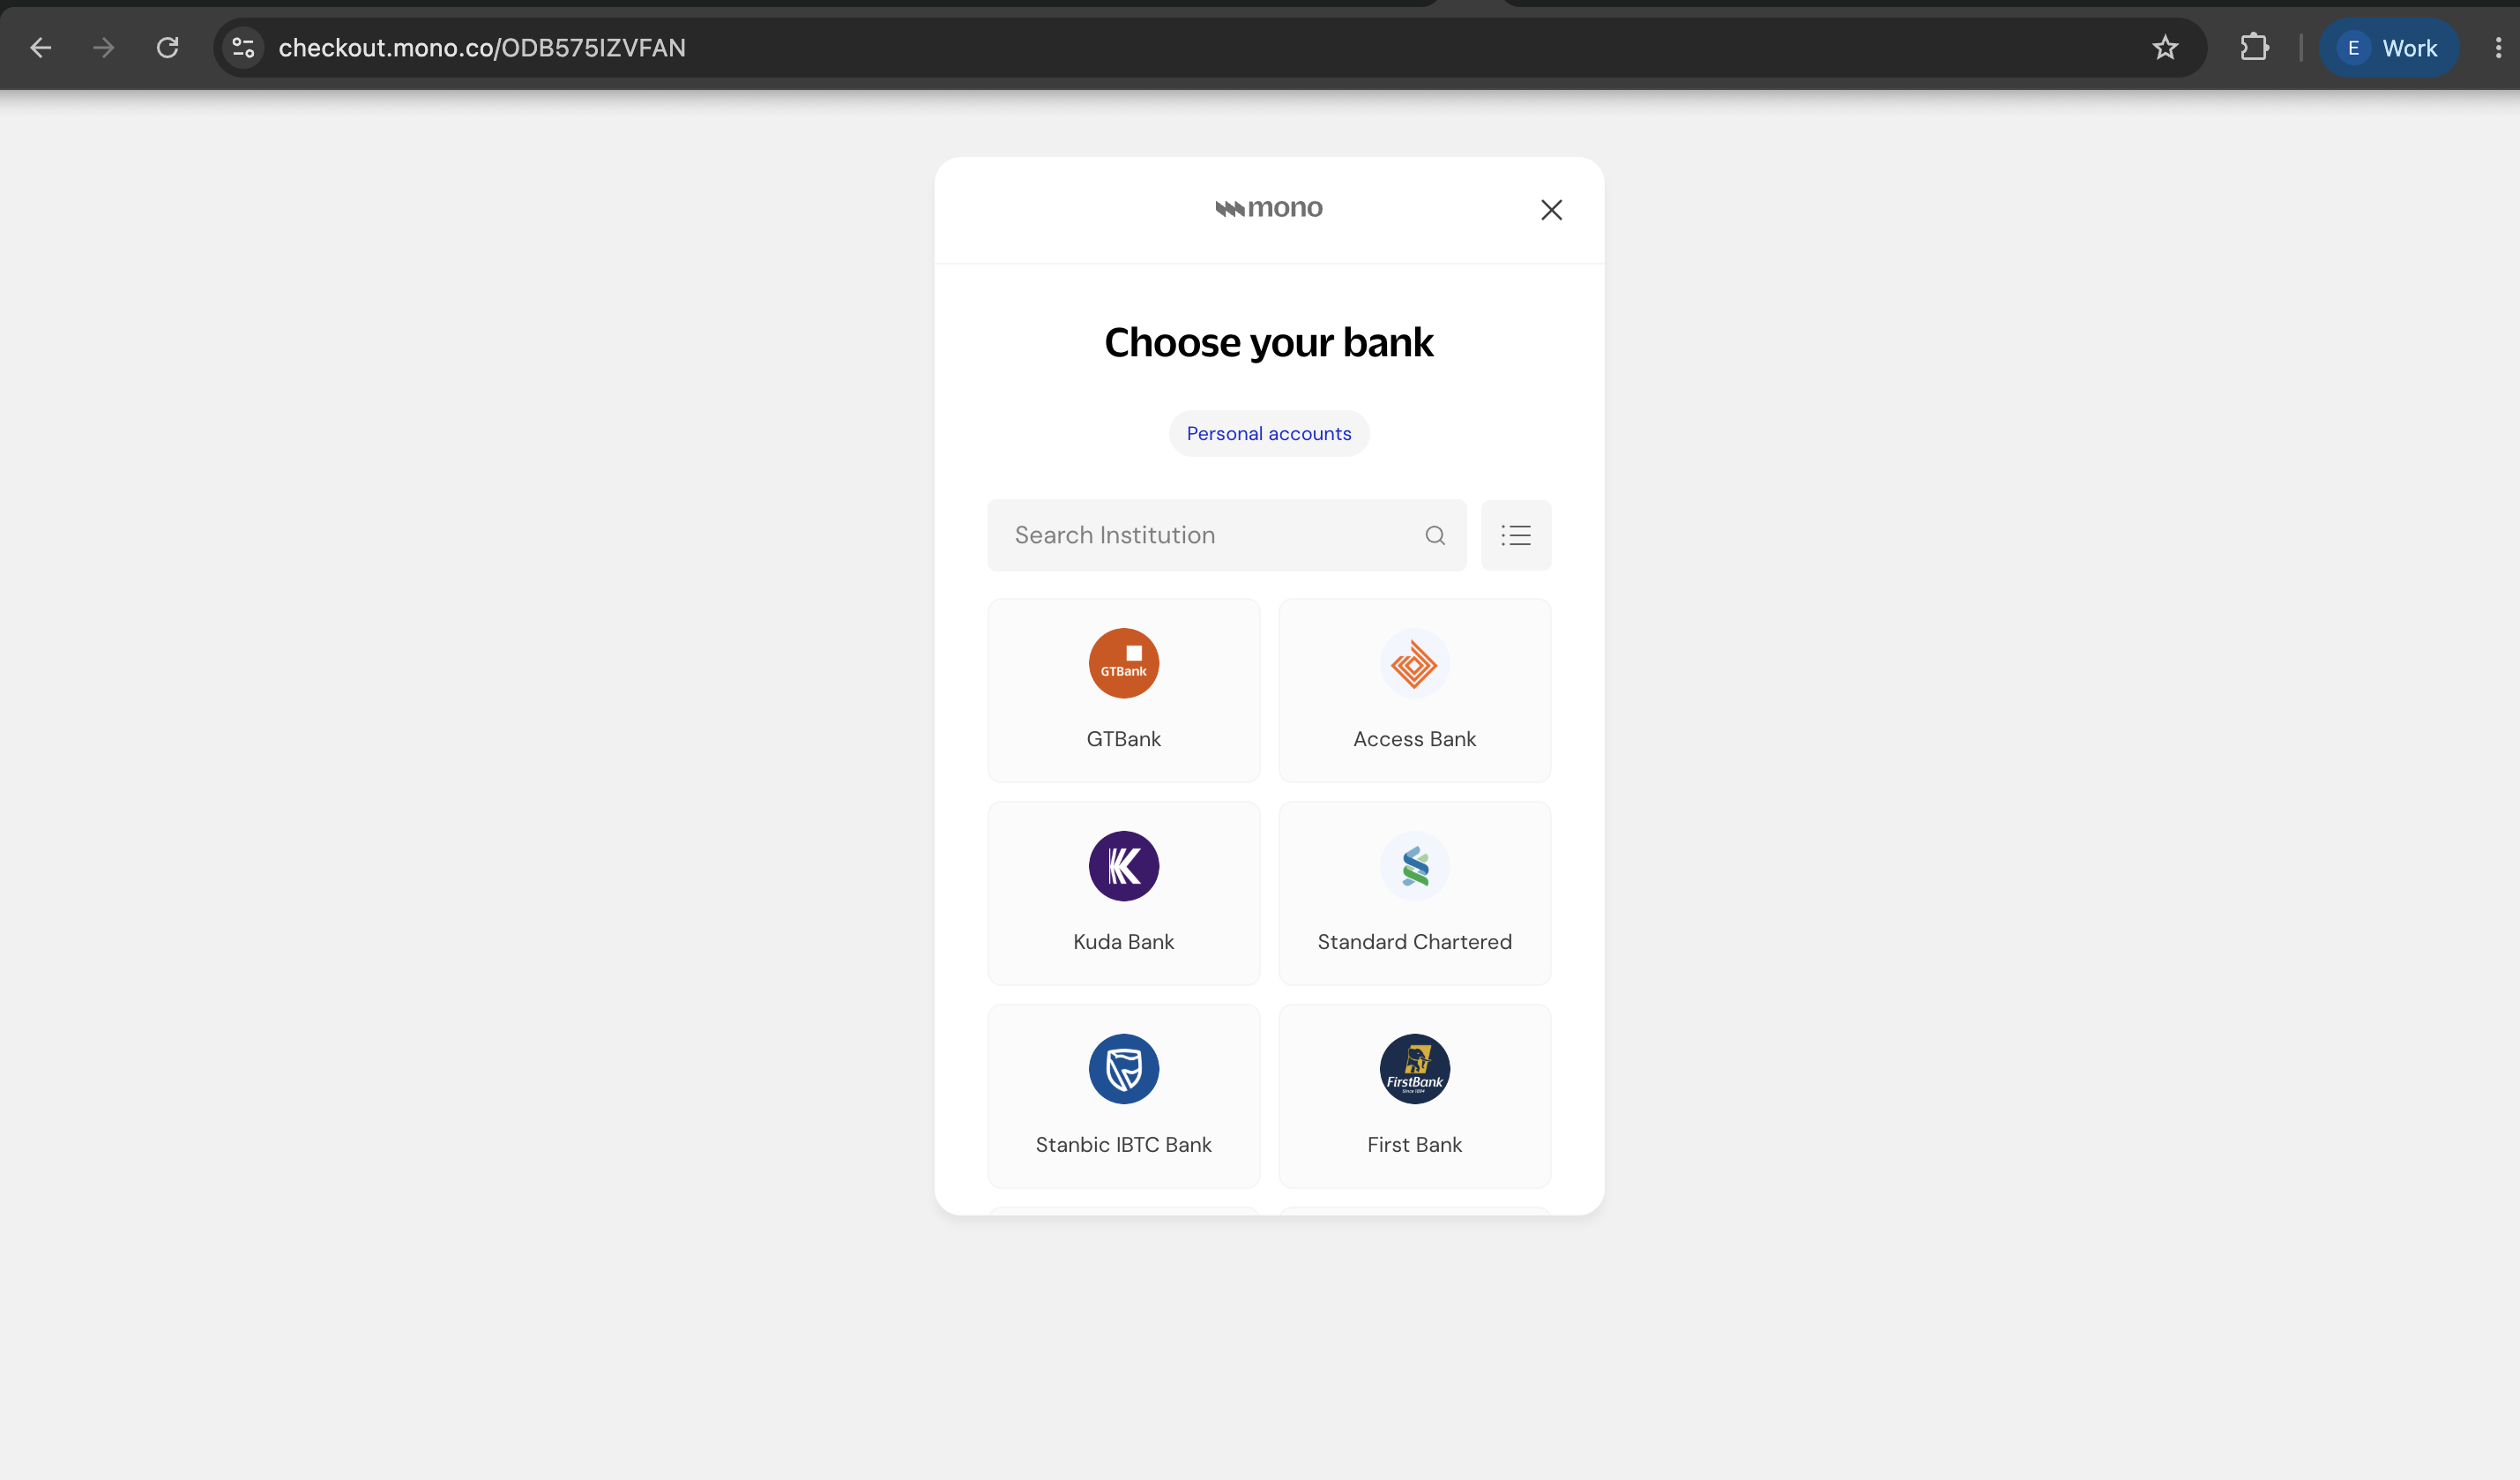
Once the payment has been authorized and completed, Flutterwave redirects the customer to the redirect_url specified in the create a charge request and sends you a webhook notifying you of the final status of the charge.
Step 5: Verify Payment
Before you provide value to the customer, confirm the transaction's final status and amount. You can verify the transaction information either using webhooks or by retrieving the charge details:
- Webhooks : It is important to have webhooks enabled on your Flutterwave dashboard. If you do not have webhooks set up, you can learn more by visiting here. If you have webhooks enabled, we'll call your webhook URL with the payment details when the charge is completed or fails. Below is a sample webhook payload:
{
  "webhook_id": "wbk_ckhz9yMjxvSPQZDeGJrt",
  "timestamp": 1786362486906,
  "type": "charge.completed",
  "data": {
    "id": "chg_SCmmjzx9Vf",
    "amount": 250,
    "currency": "NGN",
    "customer": {
      "id": "cus_Gh5xysiG40",
      "address": {
        "city": "Gotham",
        "country": "US",
        "line1": "221B Baker Street",
        "line2": "321B Hazard Avenue",
        "postal_code": "94105",
        "state": "Colorado"
      },
      "email": "[email protected]",
      "name": {
        "first": "Derek",
        "middle": "Jones",
        "last": "Blue"
      },
      "phone": {
        "country_code": "233",
        "number": "9012345678"
      },
      "meta": {},
      "created_datetime": "2026-08-07T14:41:52.180Z"
    },
    "description": null,
    "meta": {
      "person_name": "Derek Jones",
      "role": "Developer"
    },
    "payment_method": {
      "type": "bank_account",
      "bank_account": {},
      "id": "pmd_kB7xcrobND",
      "customer_id": "cus_Gh5xysiG40",
      "meta": {},
      "device_fingerprint": null,
      "client_ip": null,
      "created_datetime": "2026-08-07T14:44:34.123Z"
    },
    "redirect_url": "https://flutterwave.com/",
    "reference": "TRN-cOEunIgj74os",
    "status": "succeeded",
    "processor_response": {
      "type": "approved",
      "code": "00"
    },
    "created_datetime": "2026-08-07T14:45:45.827Z"
  }
}
- Retrieve the charge: You can manually check the status of the charge by calling the retrieve a charge endpoint using the
data.idreturned in your create a charge response.
{
    "status": "success",
    "message": "Charge created",
    "data": {
        "id": "chg_SCmmjzx9Vf",
     ...
    }
}
Sample request:
curl --request GET \
  --url 'https://developersandbox-api.flutterwave.com/charges/chg_SCmmjzx9Vf/' \
  --header 'Authorization: Bearer <YOUR_ACCESS_TOKEN>' \
  --header 'Content-Type: application/json' \
  --header 'X-Trace-Id: <YOUR_UNIQUE_TRACE_ID>' \
  --header 'X-Idempotency-Key: <YOUR_UNIQUE_IDEMPOTENCY_KEY>'
{
    "status": "success",
    "message": "Charge fetched",
    "data": {
        "id": "chg_SCmmjzx9Vf",
        "amount": 250,
        "fees": [
            {
                "type": "vat",
                "amount": 0
            },
            {
                "type": "app",
                "amount": 0
            },
            {
                "type": "merchant",
                "amount": 0
            },
            {
                "type": "stamp_duty",
                "amount": 0
            }
        ],
        "currency": "NGN",
        "customer_id": "cus_Gh5xysiG40",
        "settled": false,
        "settlement_id": [],
        "meta": {
            "person_name": "Derek Jones",
            "role": "Developer"
        },
        "payment_method_details": {
            "type": "bank_account",
            "bank_account": {},
            "id": "pmd_G6oIU2NQ9R",
            "meta": {},
            "created_datetime": "2026-08-07T14:44:34.123Z"
        },
        "redirect_url": "https://flutterwave.com/",
        "reference": "TRN-cOEunIgj74os",
        "status": "succeeded",
        "processor_response": {
            "type": "approved",
            "code": "00"
        },
        "created_datetime": "2026-08-07T14:46:24.031Z"
    }
}
Testing your integration
Testing your integration requires no extra configuration or special data. Create the Bank Account charge and open the URL returned in the next_action object. On the sandbox authorization page, enter a dummy account number and password, then select the desired transaction outcome to simulate a successful, failed, or cancelled payment.
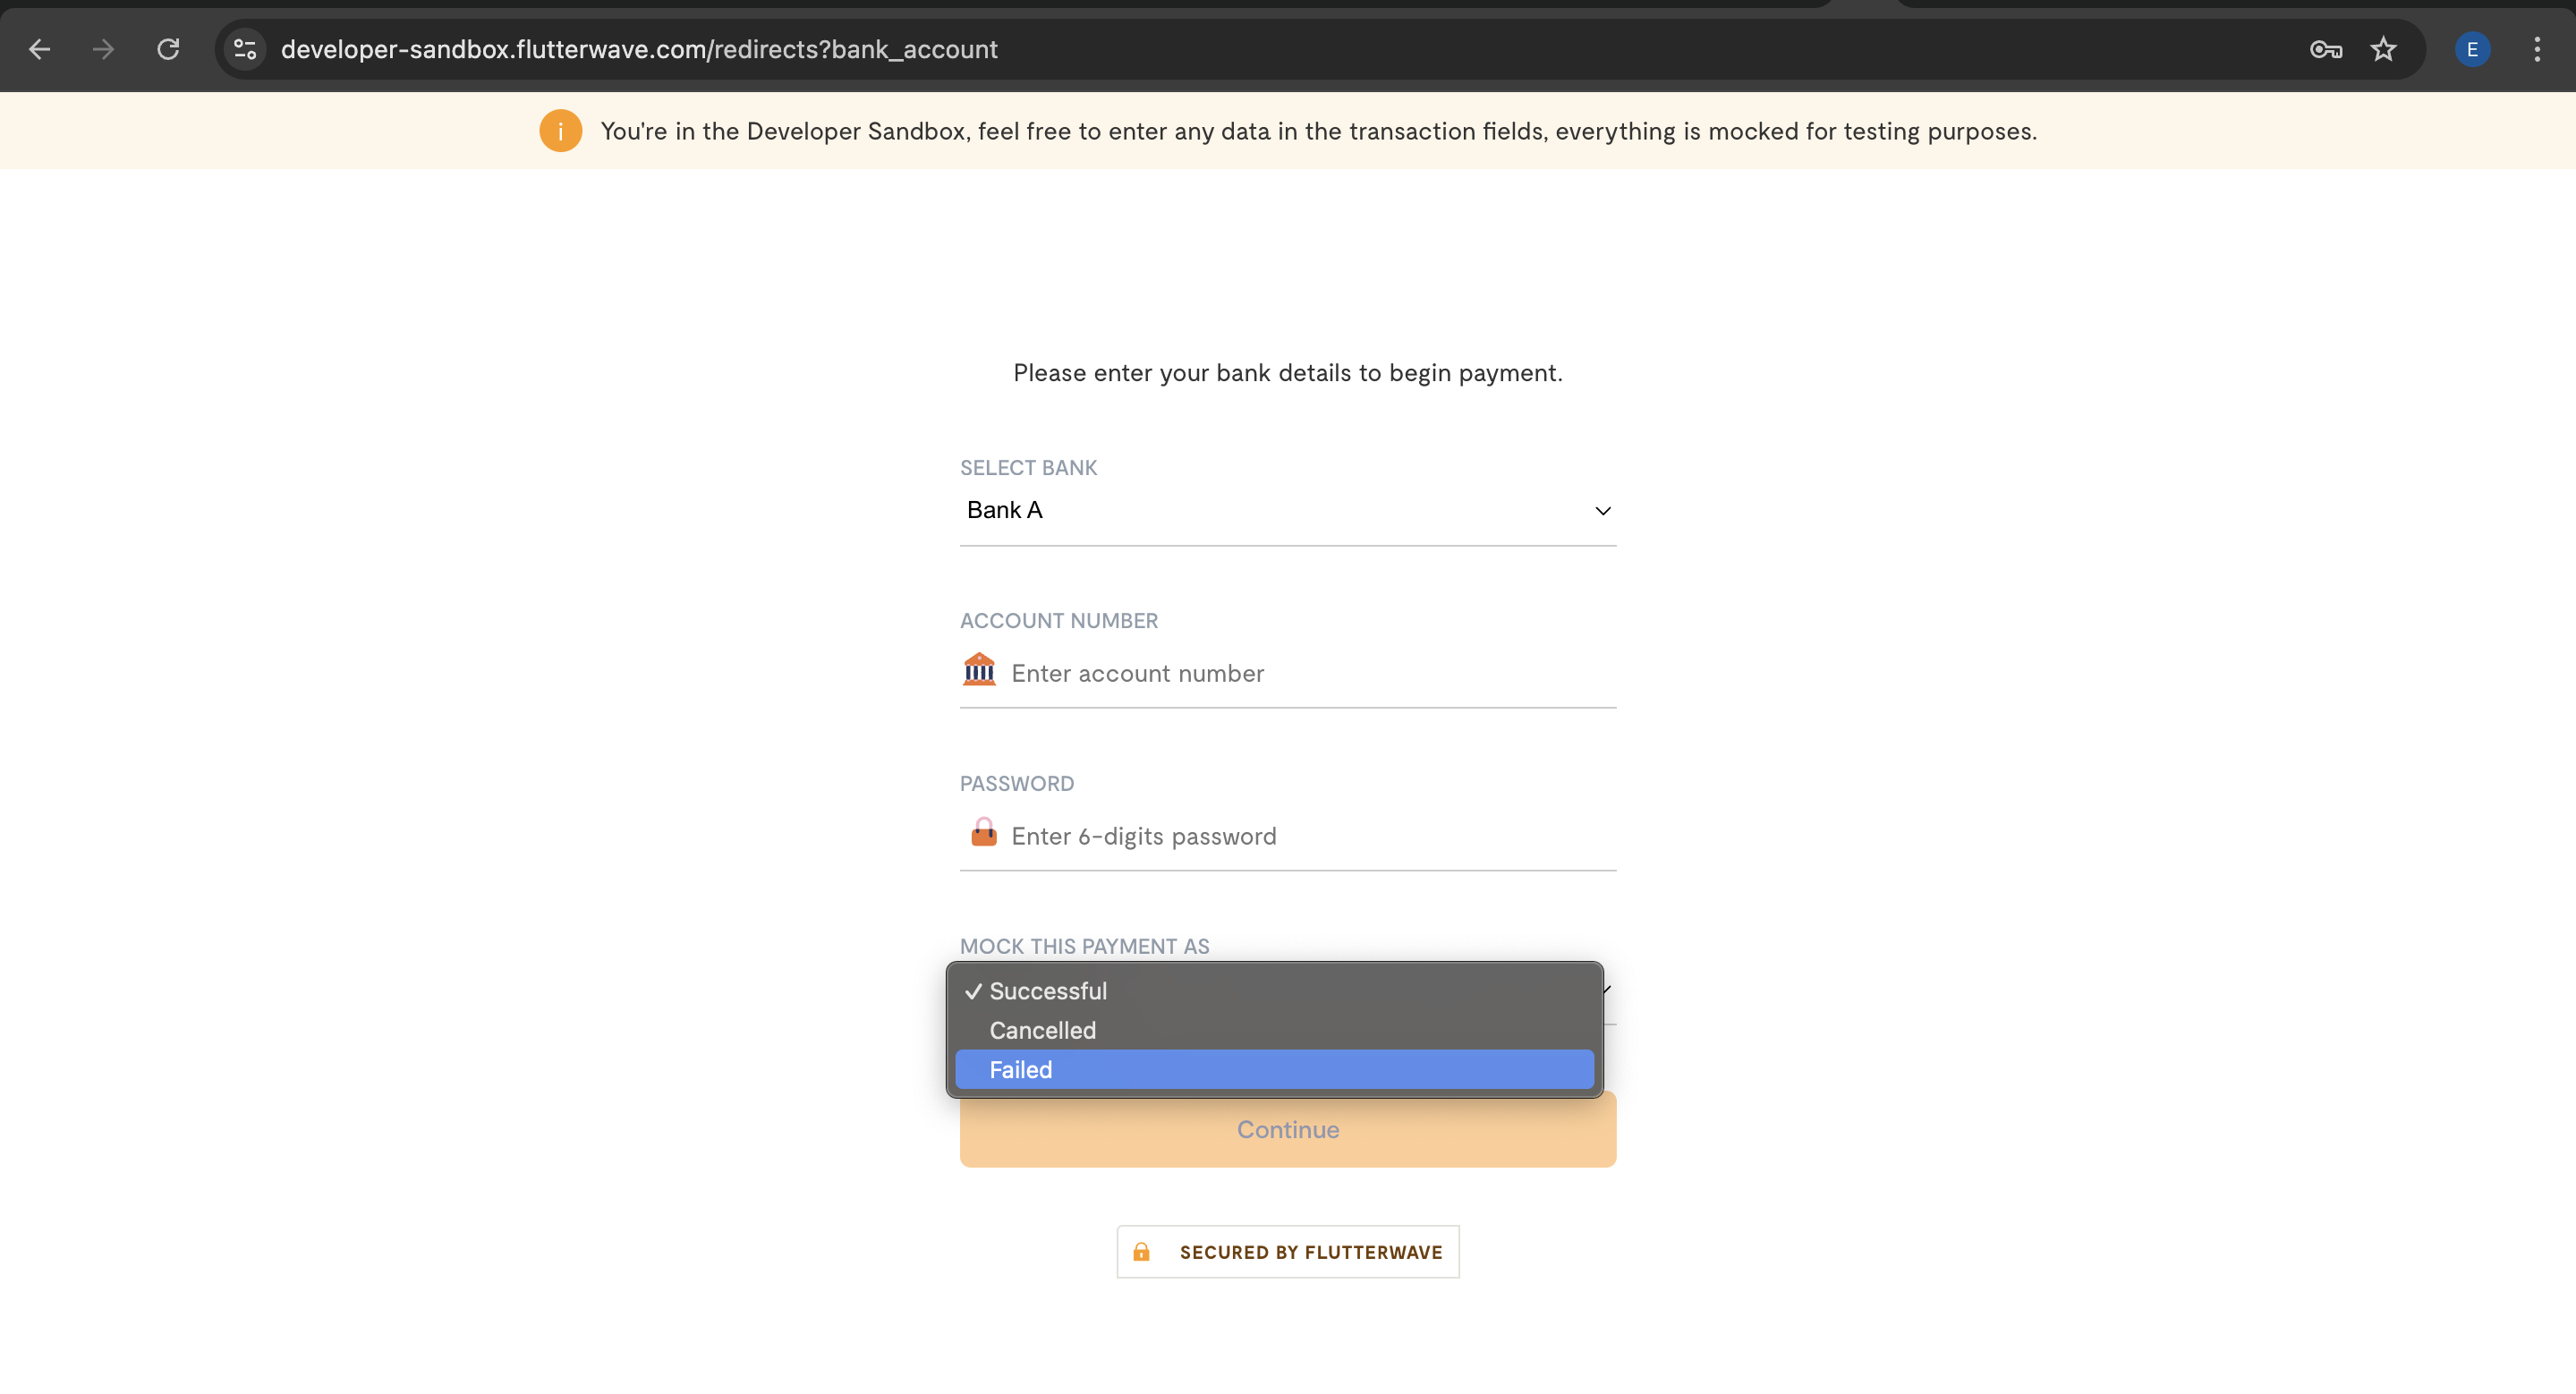
Once the mock payment is completed, you are redirected back to the redirect_url specified during charge creation. Flutterwave also sends a charge.completed webhook event to your server.
Next steps
That’s it! You’ve successfully integrated the bank account payment method. It doesn't end there, there is more:
- Learn how to set settlement of funds after a successful payment into your Flutterwave balance.
- For cases where refunds are necessary, see the refunds guide for more information on how to process transaction refunds.
Updated 21 days ago