Google Pay™️
We recommend reading our Direct Charge overview post first, to fully grasp the basics of the direct charge before you proceed. All merchants using this payment method must adhere to the Google Pay APIs Acceptable Use Policy and accept the terms defined in the Google Pay API Terms of Service.
With Google Pay, Customers can make payments with cards linked to their Google accounts. They can choose from these linked cards to make one-touch payments on the modal. This payment experience elevates UX in your application.
Pre-requisites
Before starting your integration, you should:
- Ensure that your Flutterwave account is live.
- Register your business/app on Google Pay and Wallet Console.
- Inform your customers whether Google Pay is available in their region. Here is a list of countries/regions where you can use Google Pay.
- Prompt your customers to link their cards to their Google account or confirm that they already have a linked card. Google Pay supports Visa, Mastercard, and American Express cards globally. It also supports regional cards like Discover (US 🇺🇸), Elo (Brazil 🇧🇷), Interac (Canada 🇨🇦), and Maestro (EU and Brazil).
- Confirm that your browser supports Google Pay. You can see the full list of supported browsers here.
Payment Flow
While the customer pays with just one tap, the complexity of the payment has been abstracted from the customer. As a developer, here are the important aspects of the payment you need to know about.
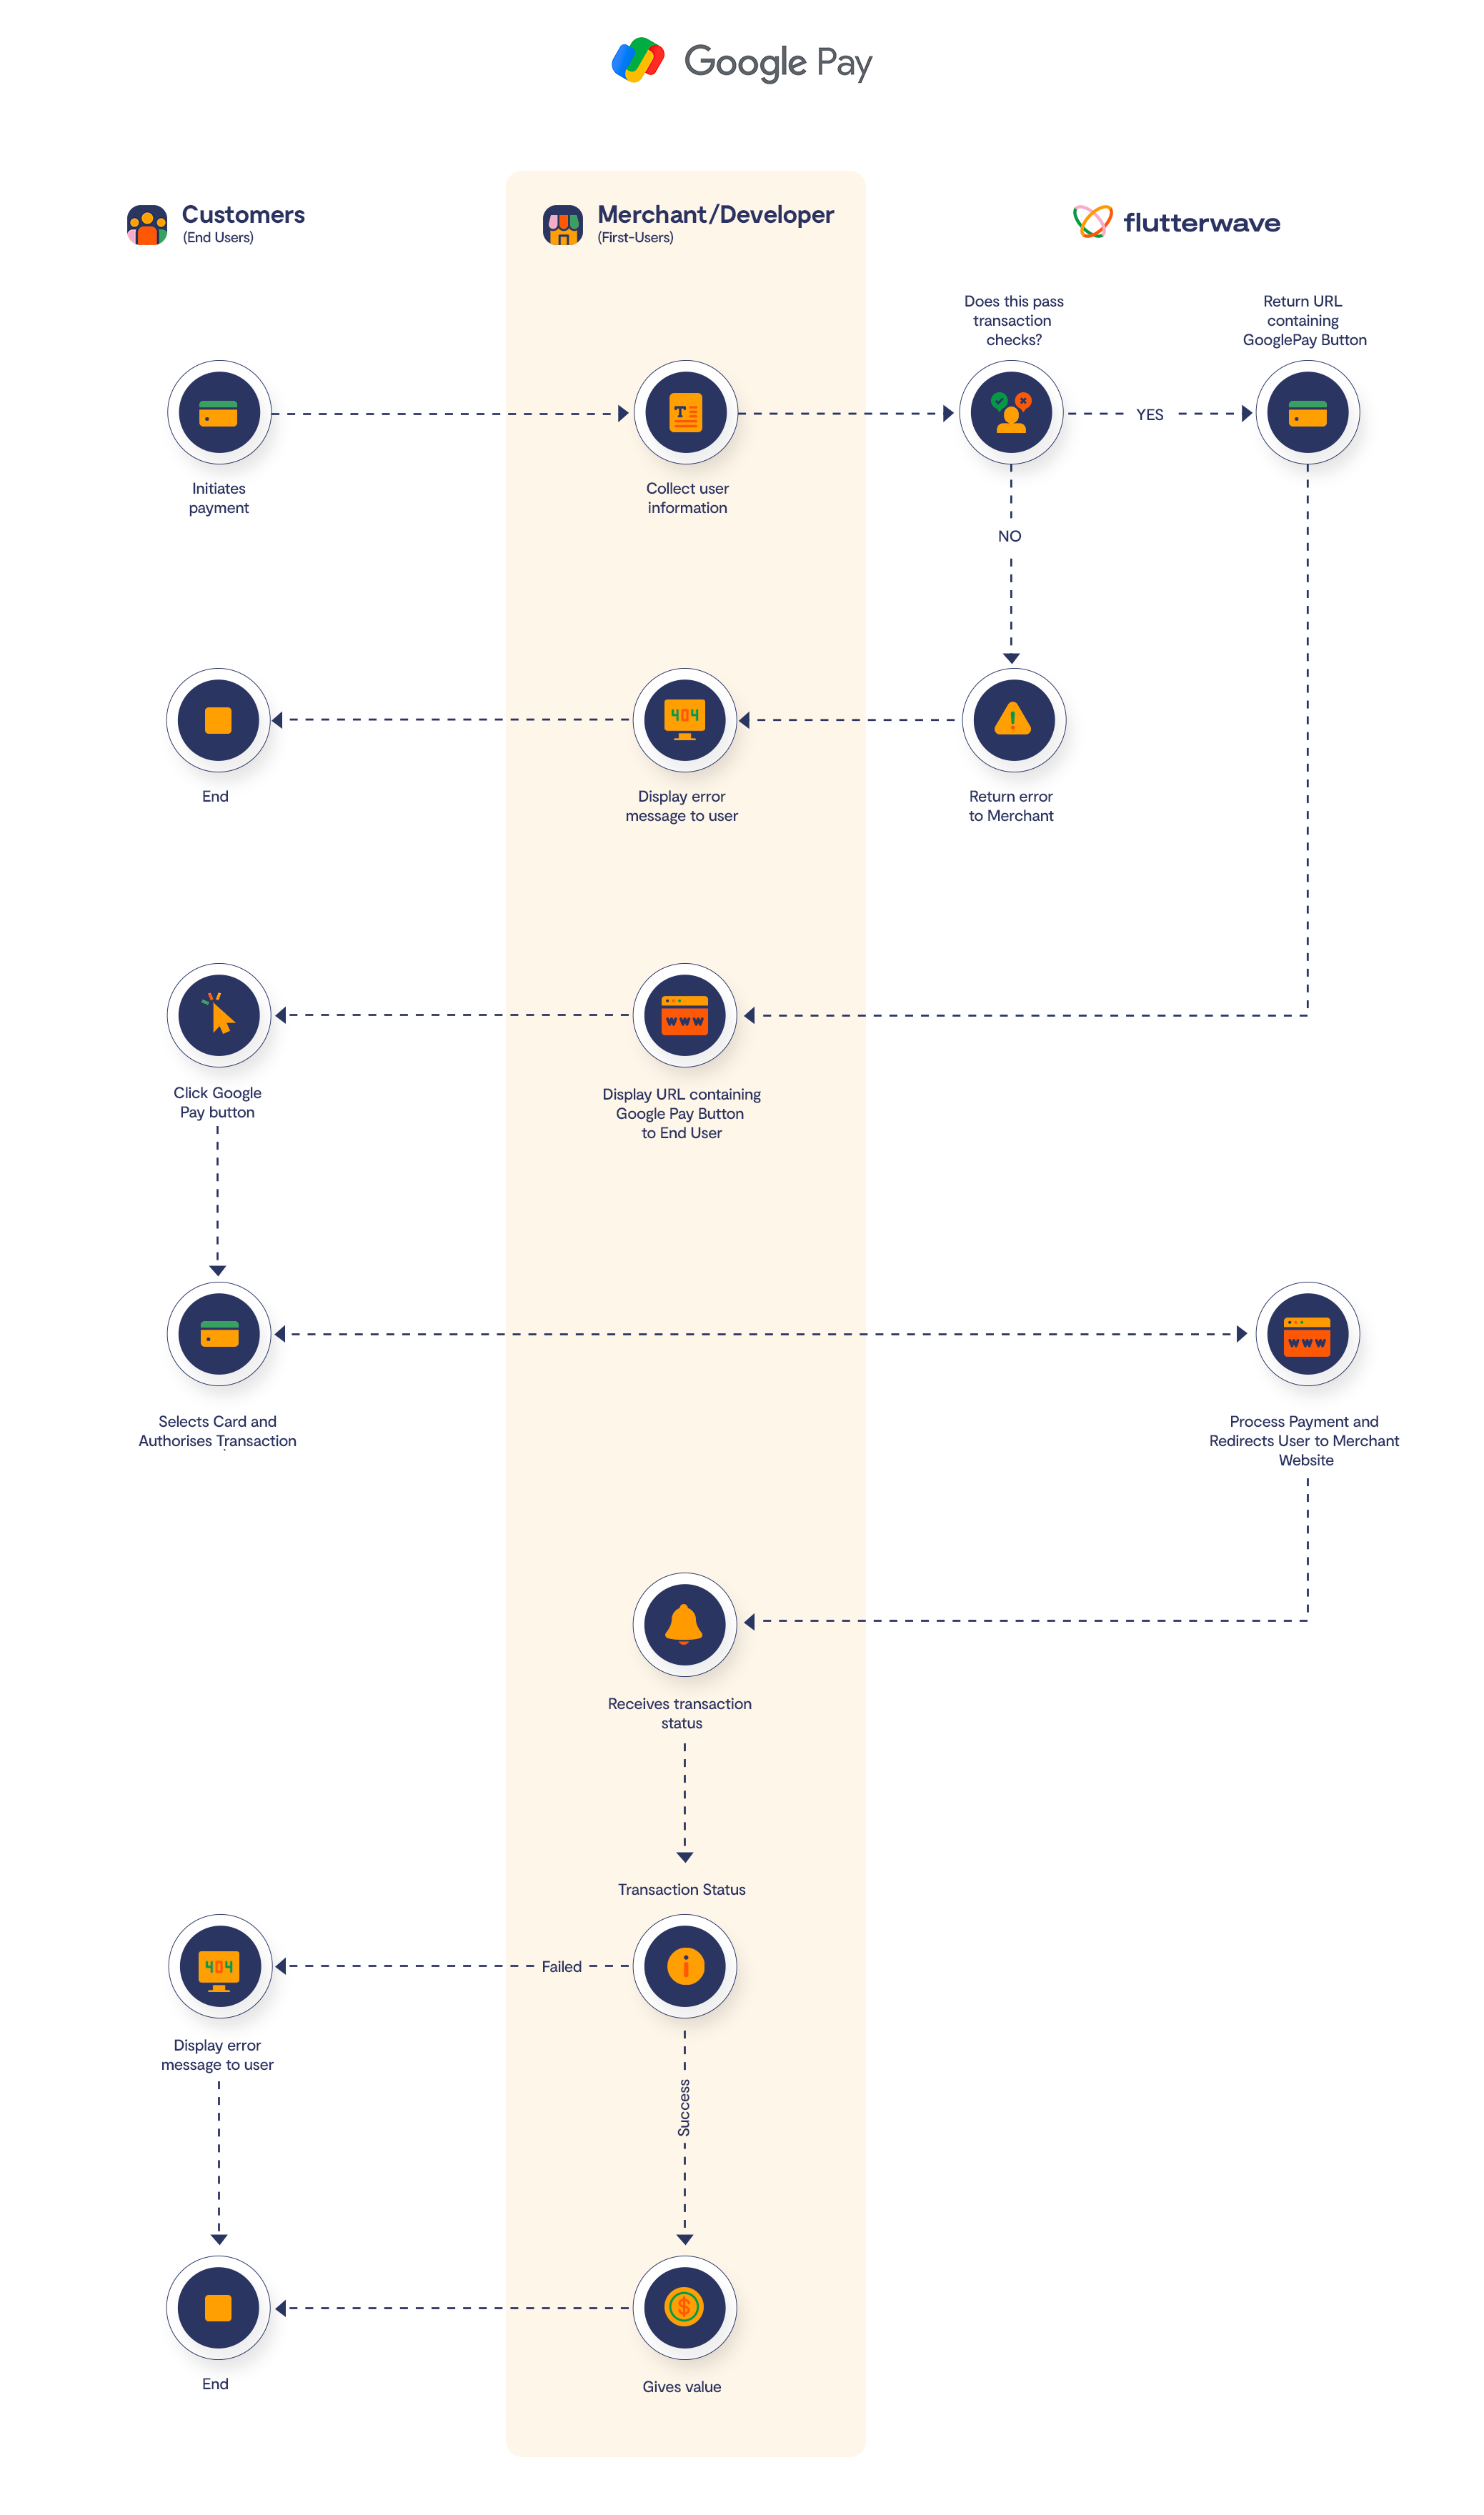
- Initiating the payment.
- Redirecting the user securely. (only redirect URLs with https TLS1.2 and above will be approved for use)
- Completing the payment.
Step 1: Initiating the payment
First, you'll need the customer's email. Combine that with the rest of the payment details to create the payload and send it to our charge endpoint. You'll need to specify amount, currency, fullname and a unique tx_ref. You can also pass more details, like the fullname and custom meta information. See the endpoint reference for all parameters that can be passed.
This payment method is not available in our backend libraries. Call the endpoint to create the checkout button in your application.
# Google Pay
curl --request POST\
   --url https://api.flutterwave.com/v3/charges?type=googlepay\
   --header'Authorization: Bearer YOUR_SECRET_KEY'\
   --header'content-type: application/json'\
   --data'{
     "amount": 100,
     "currency": "USD",
     "email": "developers@flutterwavego.com",
     "fullname": "Flutterwave Developers",
     "tx_ref": "BJUYU399fcd43_success_mock"
}'
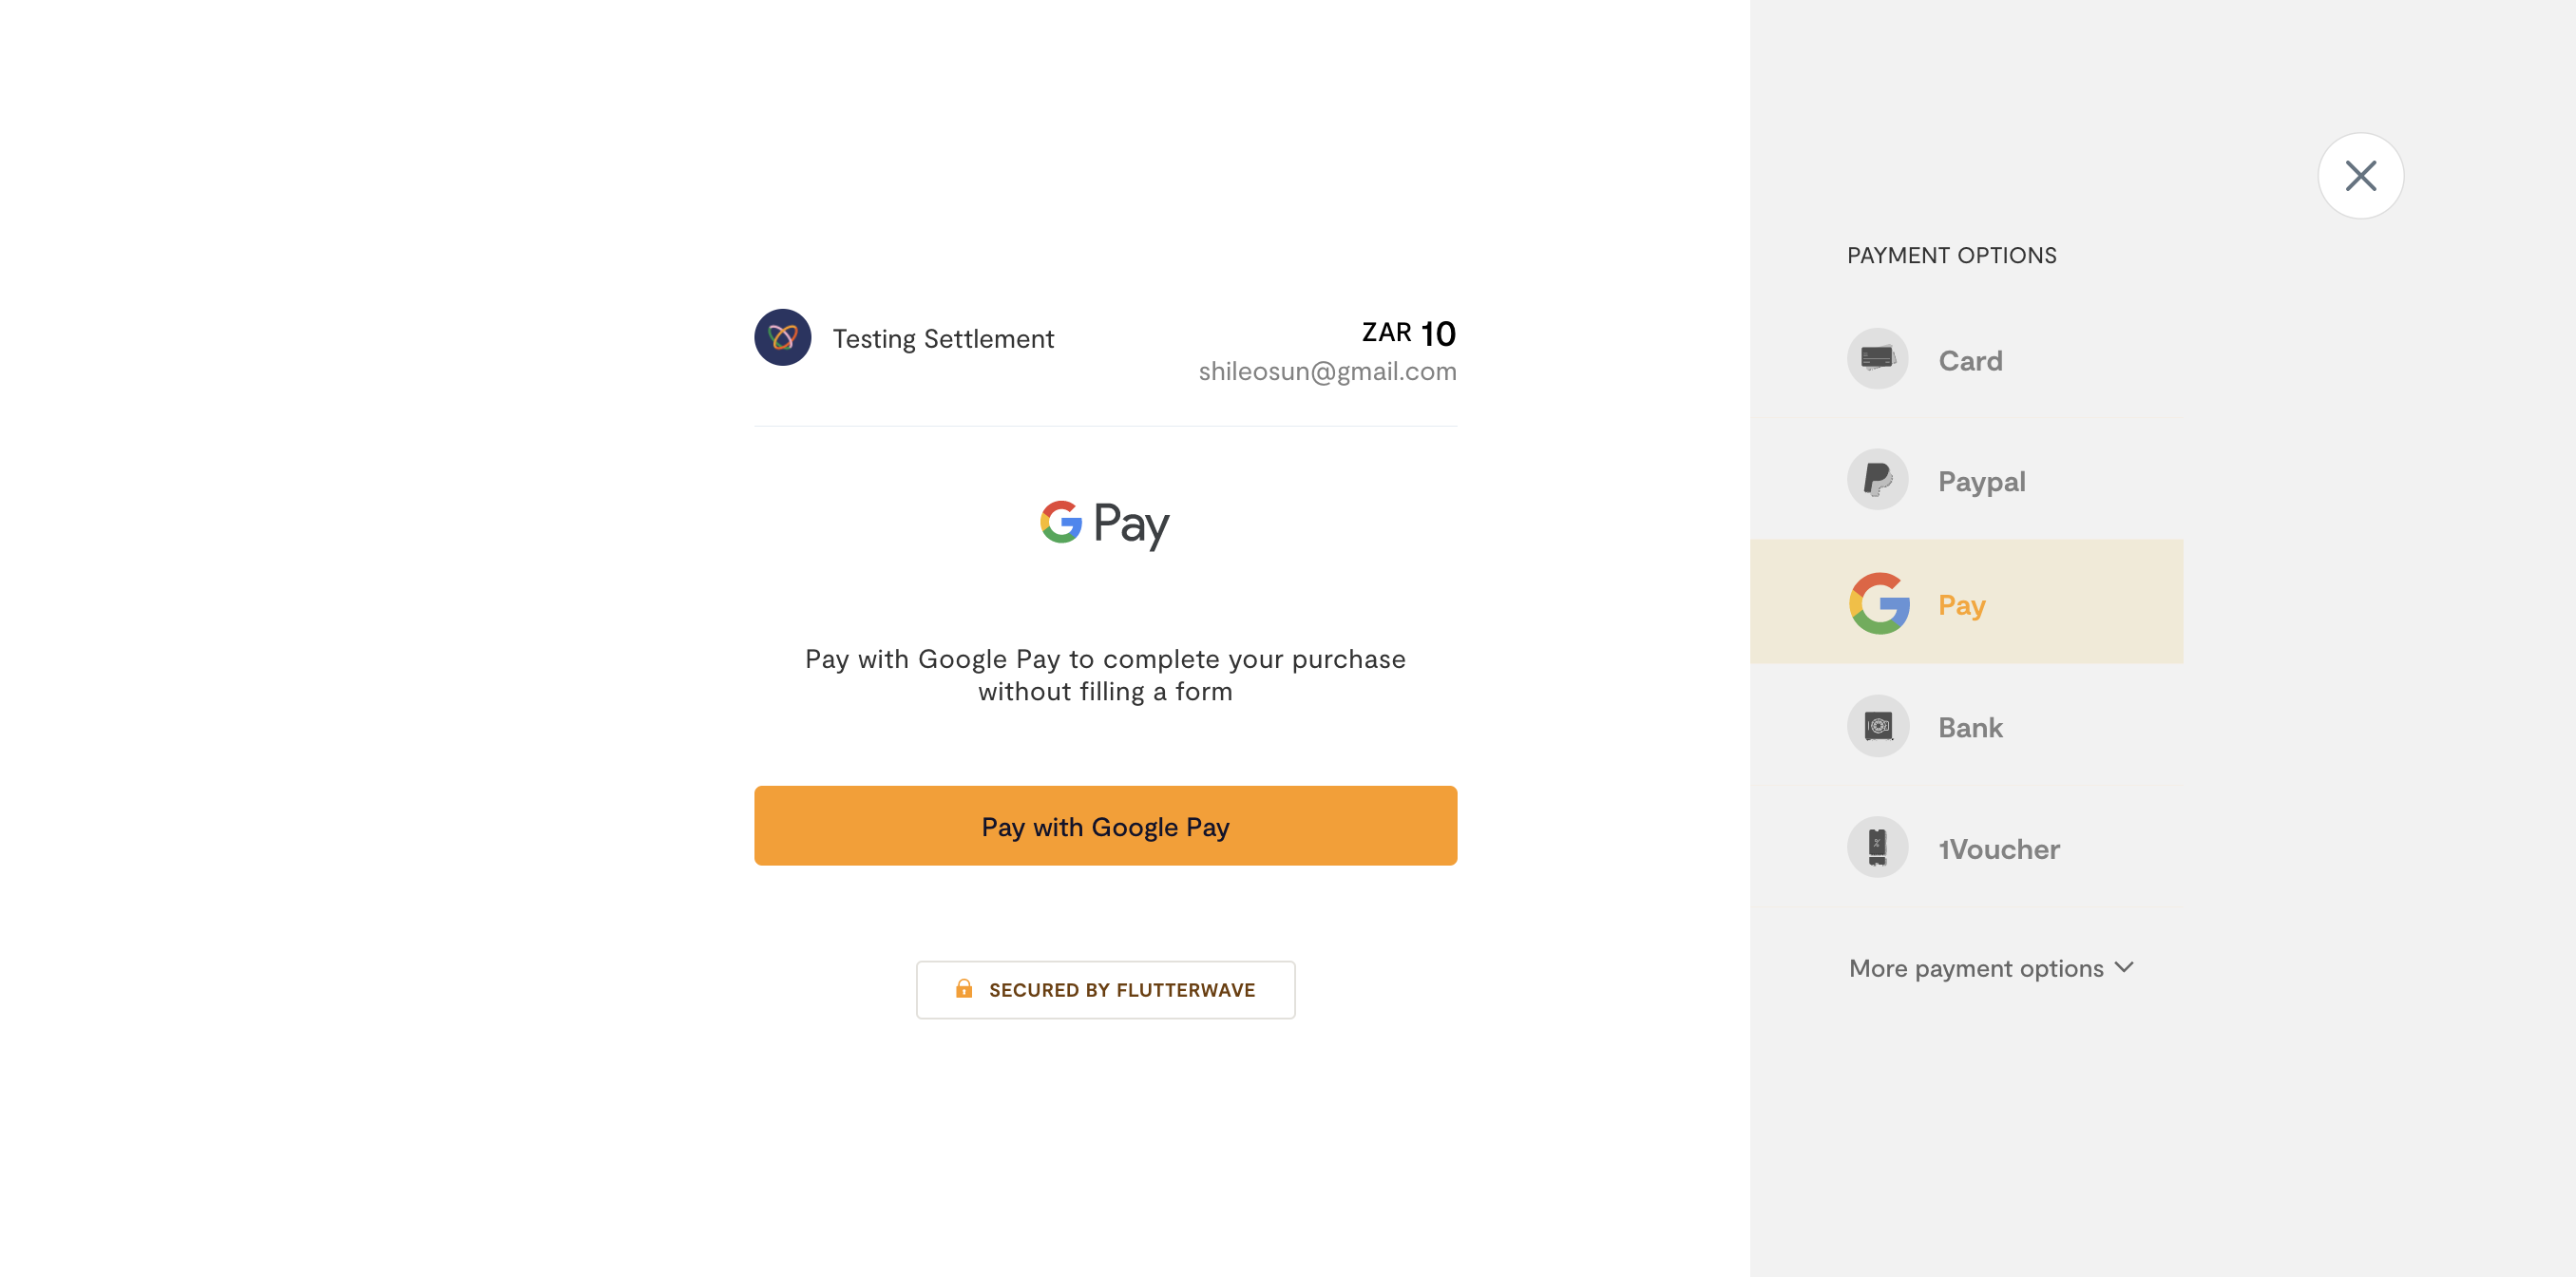
Generating a payment link via standard would open a modal like this.
Step 2: Redirecting your customers
After a successful charge, You'll get a response that looks like this:
{
   "status":"success",
   "message":"Charge initiated",
   "data":{
      "id":2615403,
      "tx_ref":"MC-TEST-1234568_success_mock",
      "flw_ref":"RQFA6549001367743",
      "device_fingerprint":"gdgdhdh738bhshsjs",
      "amount":10,
      "charged_amount":10,
      "app_fee":0.38,
      "merchant_fee":0,
      "processor_response":"Payment token retrieval has been initiated",
      "auth_model":"GOOGLEPAY_NOAUTH",
      "currency":"USD",
      "ip":"54.75.56.55",
      "narration":"Test Google Pay charge",
+     "status":"pending",
      "auth_url":"https://rave-api-v2.herokuapp.com/flwv3-pug/getpaid/api/short-url/XPtNw-WkQ",
      "payment_type":"googlepay",
      "fraud_status":"ok",
      "charge_type":"normal",
      "created_at":"2022-05-11T20:36:15.000Z",
      "account_id":20937,
      "customer":{
         "id":955307,
         "phone_number":null,
         "name":"Flutterwave Developers",
         "email":"developers@flutterwavego.com",
         "created_at":"2022-05-11T20:36:14.000Z"
      },
      "meta":{
         "authorization":{
            "mode":"redirect",
+           "redirect":"https://rave-api-v2.herokuapp.com/flwv3-pug/getpaid/api/short-url/XPtNw-WkQ"
         }
      }
   }
}
Let us take a closer look at the response:
statusis"successful", which means the charge was initiated successfully.data.statusis"pending", meaning that the payment has been initiated but the payment has not yet authorized/approved by the User.meta.authorizationcontains the important details to complete the payment. Themeta.authorization.redirectfield has the redirect URL to complete the payment.
This redirect URL houses the Google Pay button. After redirecting your customers to the page, they should see the hosted page with the Google pay button.
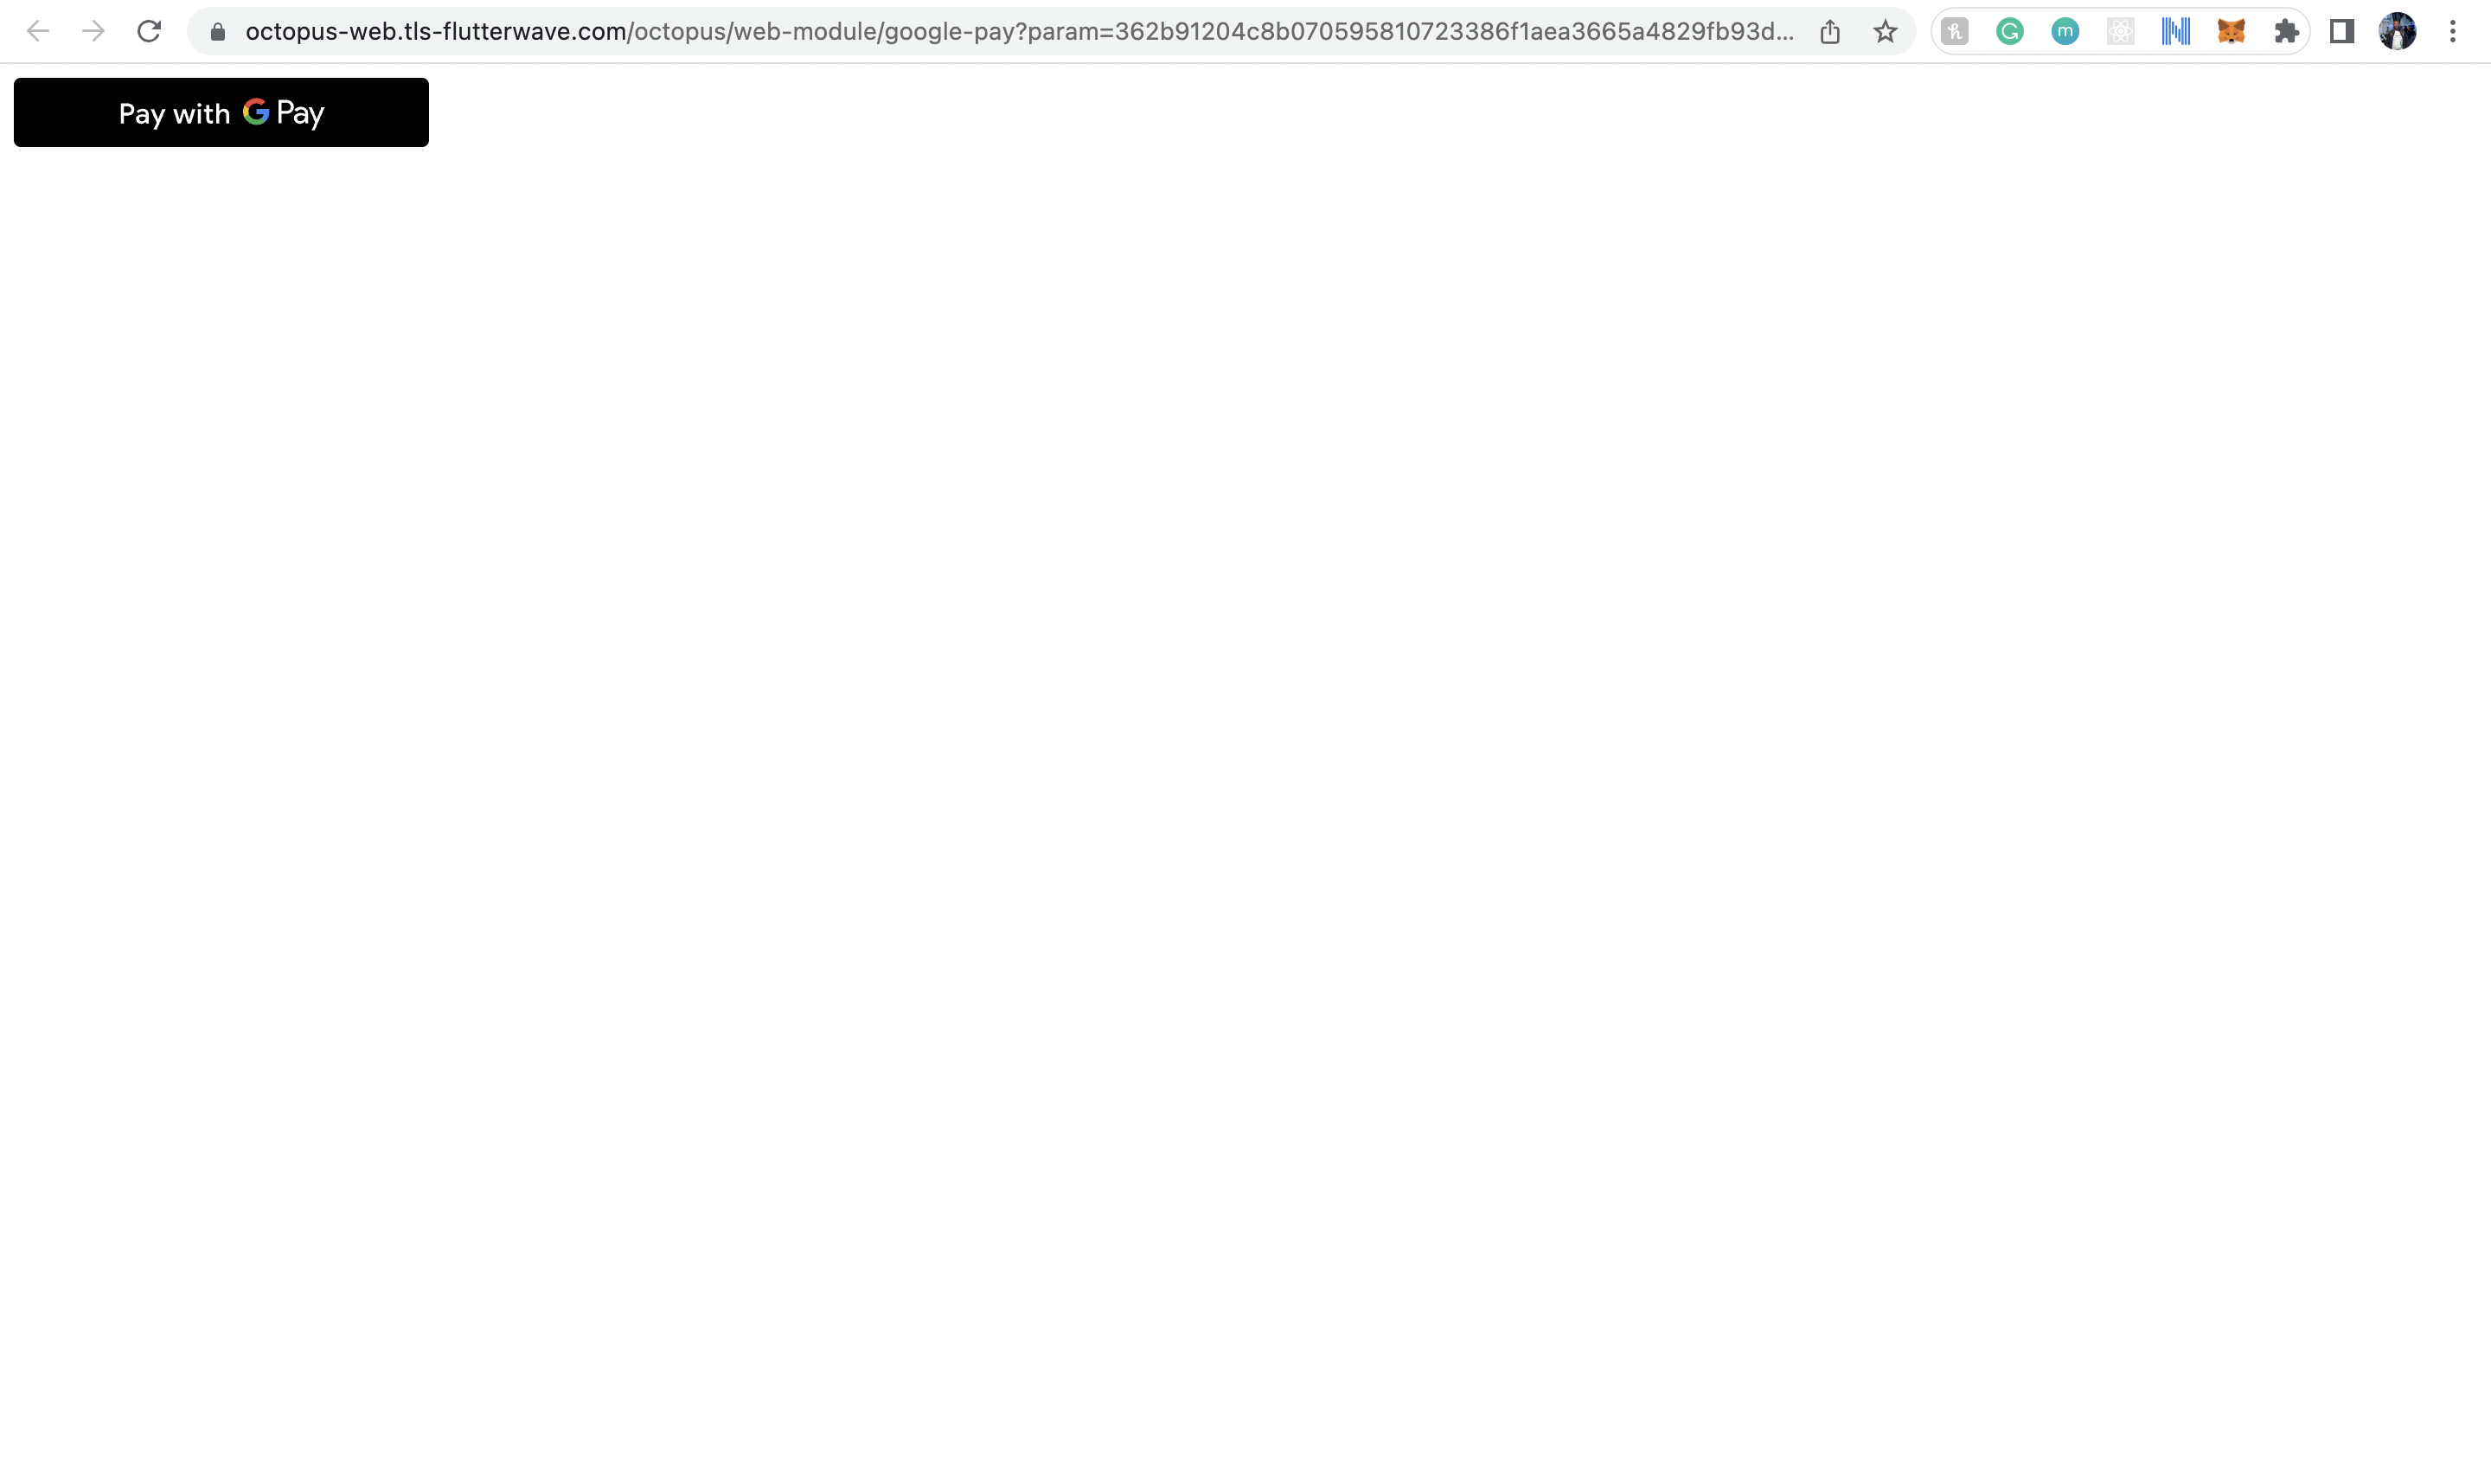
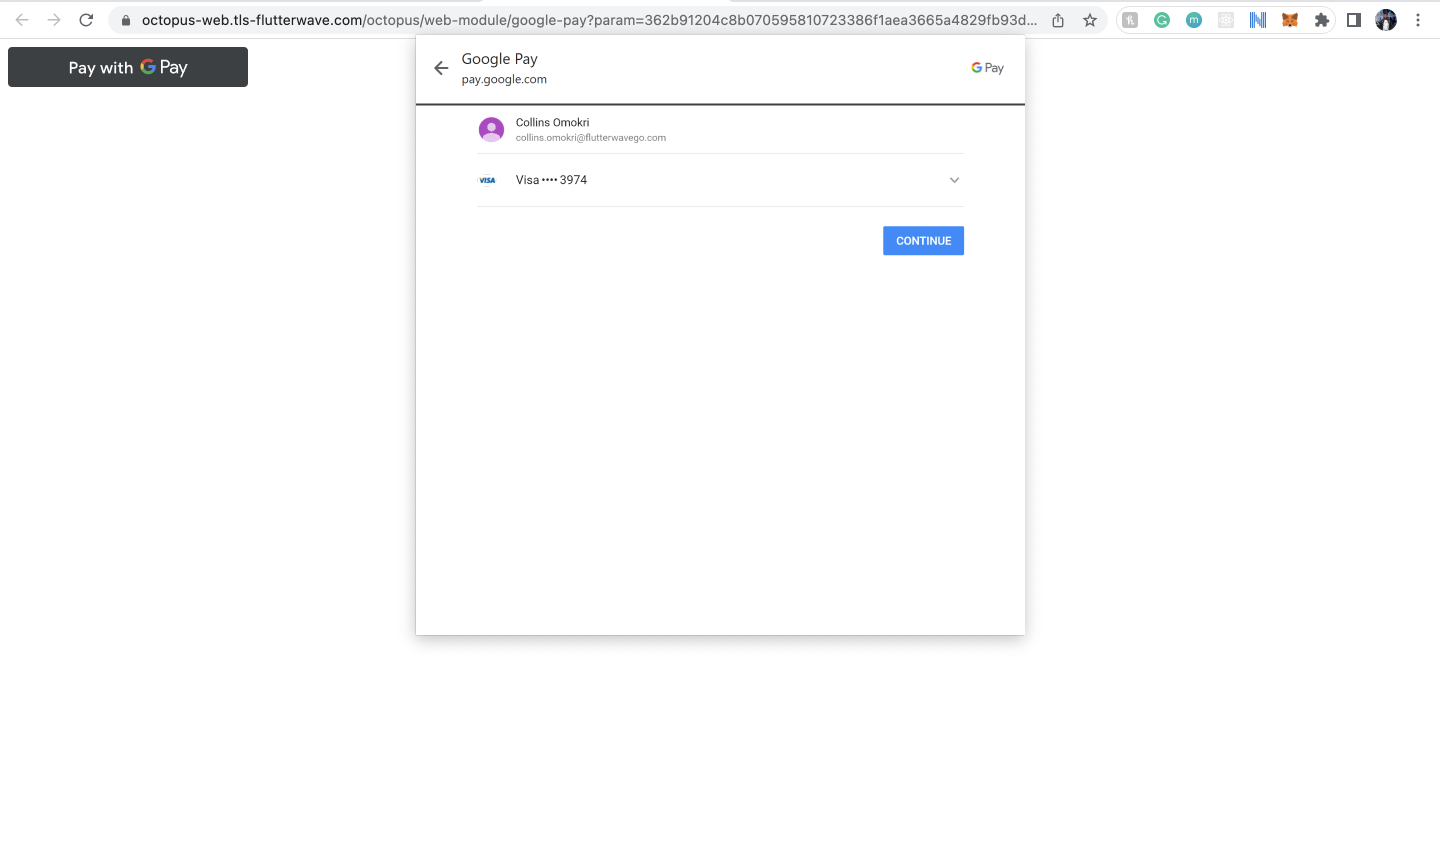
On clicking the button, the Google pay modal opens up and the customer selects their preferred card to complete the transaction.
Step 3: Completing the payment
After completing the payment, we'll send you a webhook response to your server. Here is an example webhook response:
{
   "event":"charge.completed",
   "data":{
      "id":2615978,
      "tx_ref":"OD3fed90d2-b441-4998-8d72-fd537acd37f1098hs_success_mock",
      "flw_ref":"XIPY8364001385338",
      "device_fingerprint":"N/A",
      "amount":1,
      "charged_amount":1,
      "app_fee":0.04,
      "merchant_fee":0,
      "processor_response":"Payment token retrieval has been initiated",
      "auth_model":"GOOGLEPAY_NOAUTH",
      "currency":"USD",
      "ip":"54.194.143.237",
      "narration":"GooglePay Transaction FOR Flutterwave Developers",
      "status":"pending",
      "auth_url":"https://rave-api-v2.herokuapp.com/flwv3-pug/getpaid/api/short-url/rjNCjCm5K",
      "payment_type":"googlepay",
      "fraud_status":"ok",
      "charge_type":"normal",
      "created_at":"2022-05-19T08:17:02.000Z",
      "account_id":718972,
      "customer":{
         "id":955498,
         "phone_number":null,
         "name":"Anonymous customer",
         "email":"user@flw.com",
         "created_at":"2022-05-19T08:17:01.000Z"
      }
   },
   "meta_data":{},
   "event.type":"GOOGLEPAY_TRANSACTION"
}
In your webhook implementation, on receipt of the hook, you must verify the payment and give value customer. See our guide to transaction verification for details
Testing Google Pay
You can find test credentials and mock data for your Integration tests in the testing helpers section.
Next Steps
Congrats 🎉 on your successful integration. Improve your app's payment experience with
- Google brand guide.
- Google Pay UX best practices.